If you like Sanrio, you’ll love these Kuromi perler beads! Get over 20 fun and easy patterns for this mischievous yet cute character.
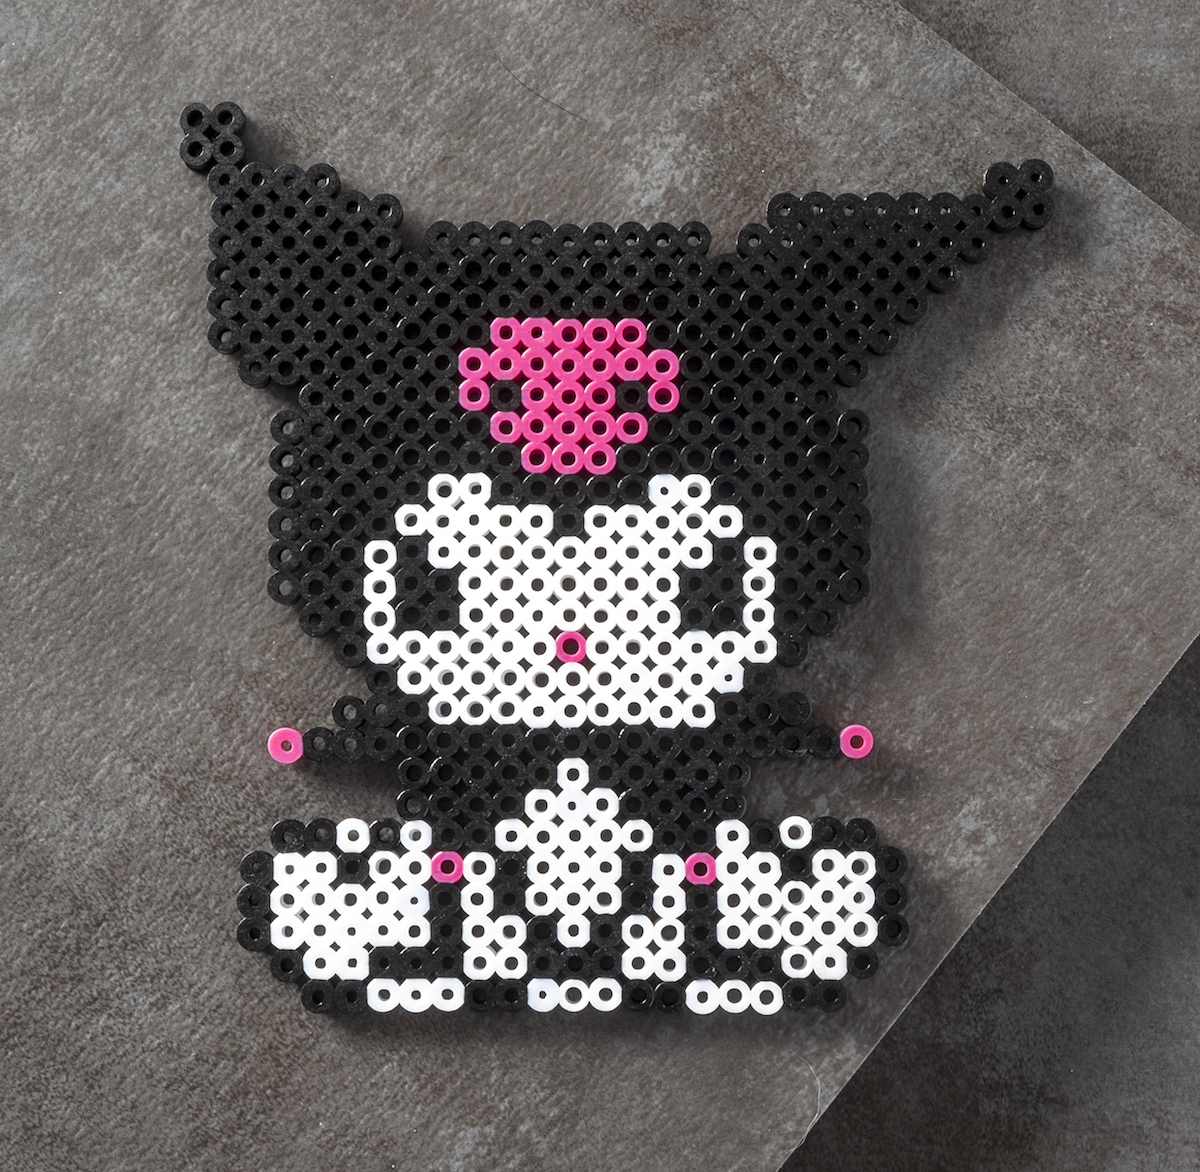
I have to admit, I’m completely behind the times when it comes to Kuromi. I’m very familiar with Sanrio, of course – big Hello Kitty fan, and all the other characters like My Melody and the Little Twin Stars. I thought there wasn’t a Sanrio character that I didn’t know.
But as it turns out, Kuromi was after my time.
Yes, I’m old. Kuromi was created by Sanrio designer Yumi Yamashita and made her first appearance in 2005. I’m not sure what I was doing, but I think we can all agree that I wasn’t paying attention. Because for a long time, I had no idea she even existed!
Kuromi is an interesting character because she is My Melody’s main “rival” and depicted as mischievous and sassy. This is in stark contrast to the sweetness and innocence of My Melody.
I kind of dig her though.
Kuromi is energetic, rebellious, and often enjoys stirring up trouble. She can be seen as a bit of a tomboy, and her tough exterior hides a softer side. Despite her mischievous nature, she values her friendships and is loyal to her friends.
Maybe I see a little bit of her in myself.
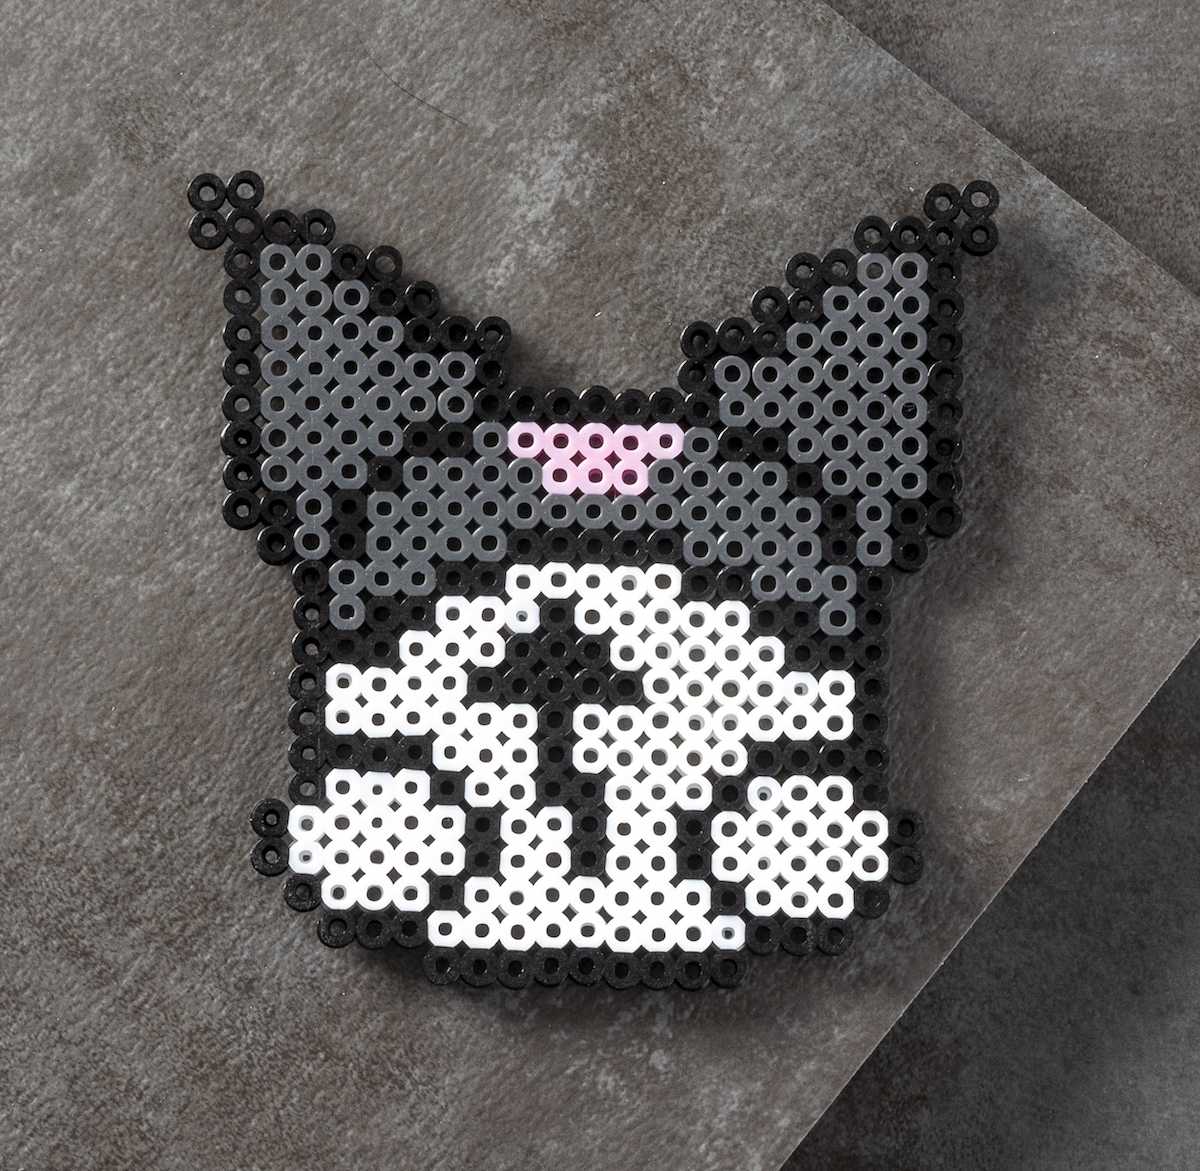
Kuromi is often associated with the color black and skulls. This darker aesthetic, combined with her cute and playful nature, has made her a favorite among fans who appreciate a different twist on the typical Sanrio character.
I’ve really learned to love this devilish little cutie. And if you’re here, you probably love her too. And want to make some Kuromi perler beads!
I’ve got good news . . . we’ve got over 20 patterns for you ranging in size from large to small. There are also a variety of poses for you to check out. I guarantee you will find a perler pattern you like in this collection.
Perler beads are recommended for ages six and up, so this is a very fun craft to try with your elementary age kids. All children seem to love perler beads (also known as hama beads, fuse beads, or melty beads). But don’t be shy – adults love them too!
Tips for Using Perler Beads
Before we get into the Kuromi hama beads, I want to review a few basics of using fuse beads to make sure you get the best results. If you don’t want the tips, scroll down to the bottom to get the patterns and tutorial.
Remember that the overall goal is to melt the beads together on both sides while still leaving the holes open. Here’s how you achieve success (with a rainbow as an example).
Use Ironing or Parchment Paper
Place ironing paper or parchment paper over the beads on the pegboard. Be gentle so you don’t disturb the beads underneath.
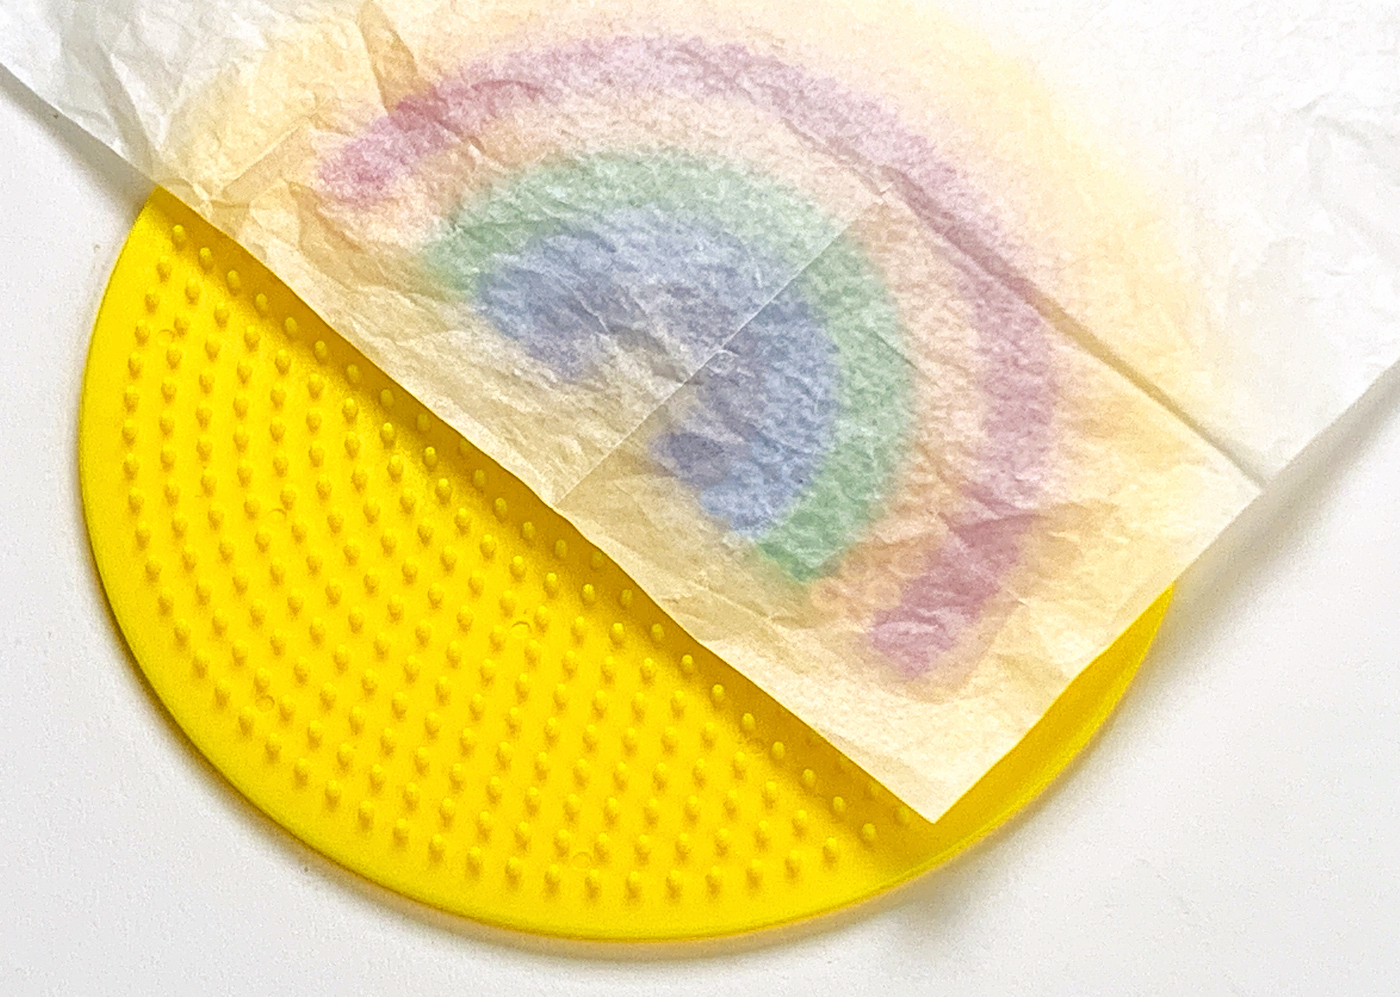
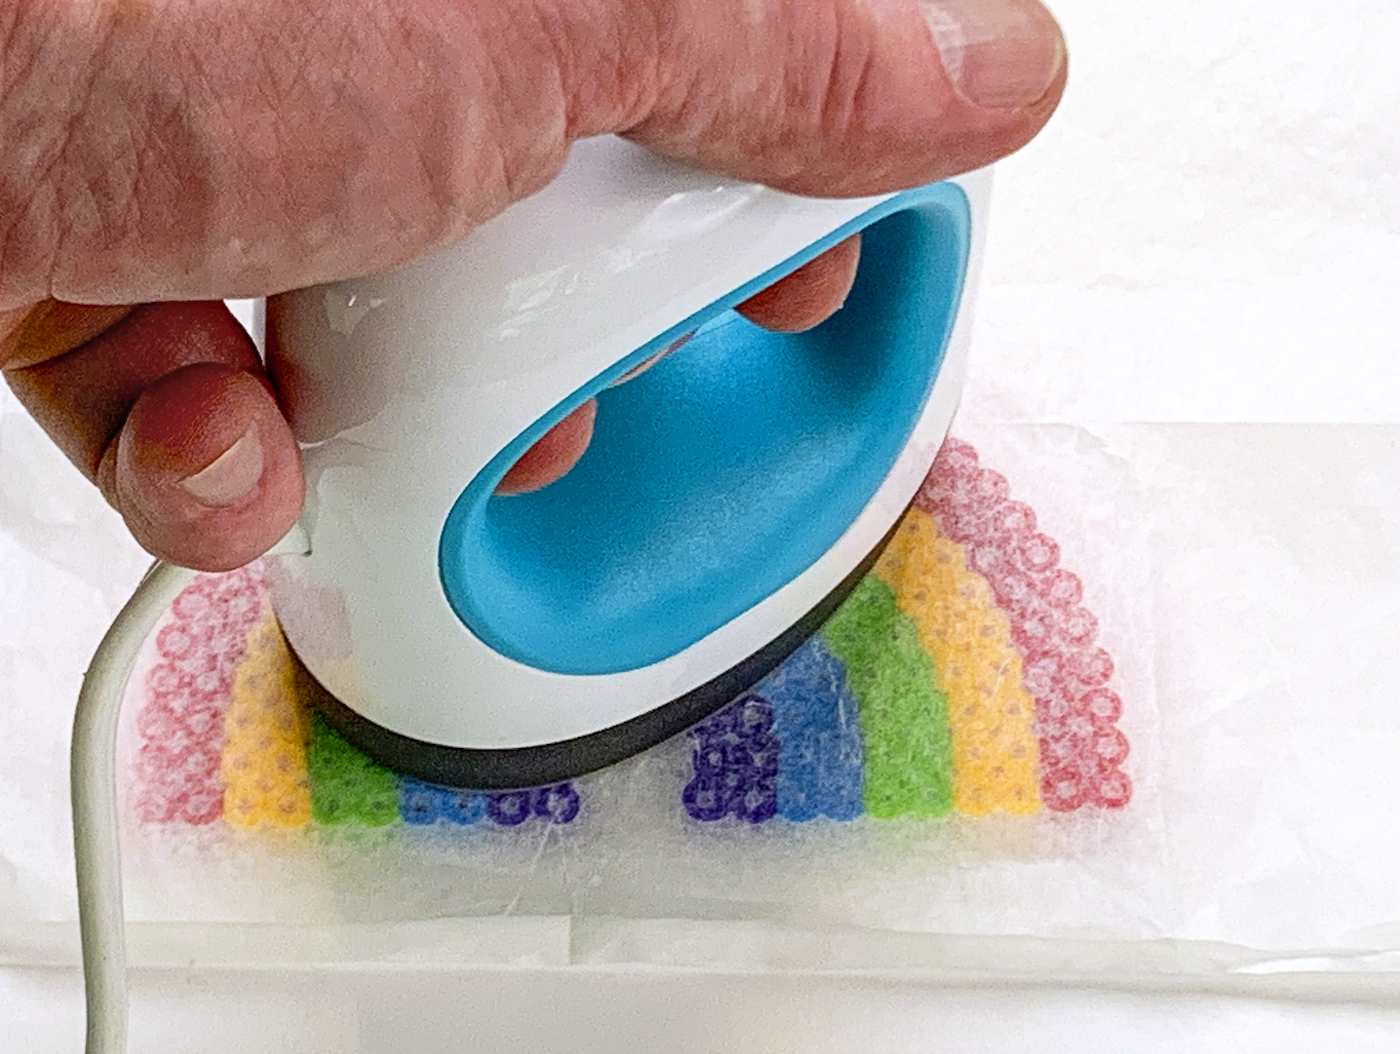
Heat your iron to the medium setting (no steam). In a circular motion, begin to iron the project. Don’t press down too hard with the iron.
When ironed properly, the beads will still have an open center. Check and make sure your edges are melted. Let the design cool on the pegboard.
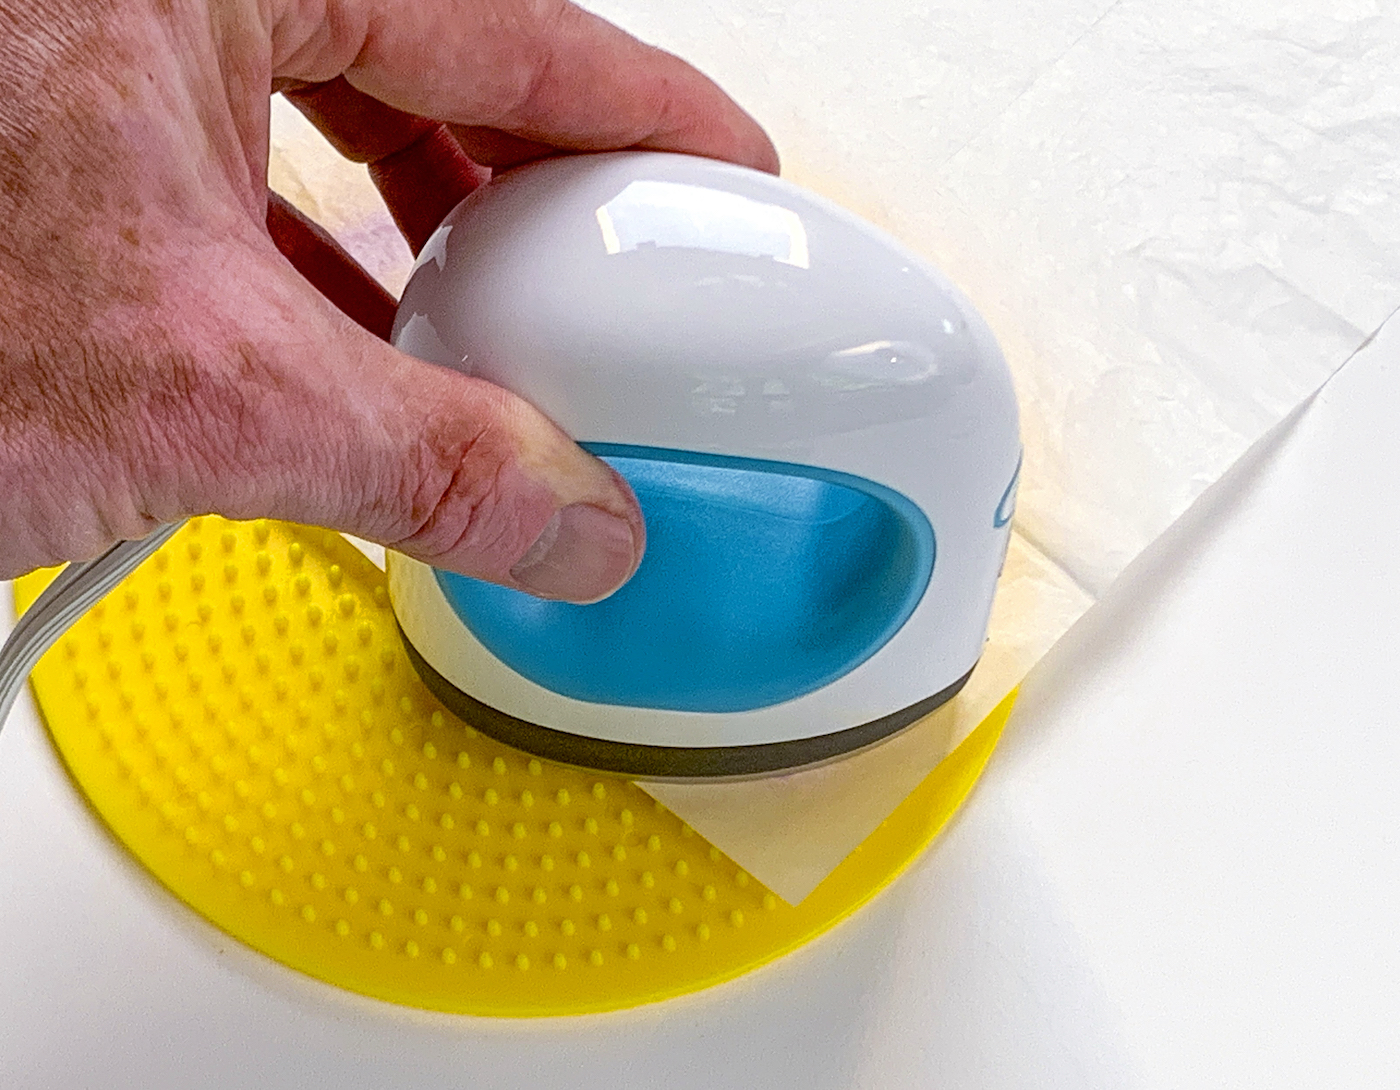
Note: BE CAREFUL about lifting up the paper while you’re ironing! If you want to check, carefully peel back paper around the edge of your design and see if all the beads are melted.
If you lift the paper up quickly and there are a lot of unmelted beads, they will easily fall off or go flying and you may be forced to start over. Sometimes the edges need more time so when you check, just check the edges and peel paper back slowly.
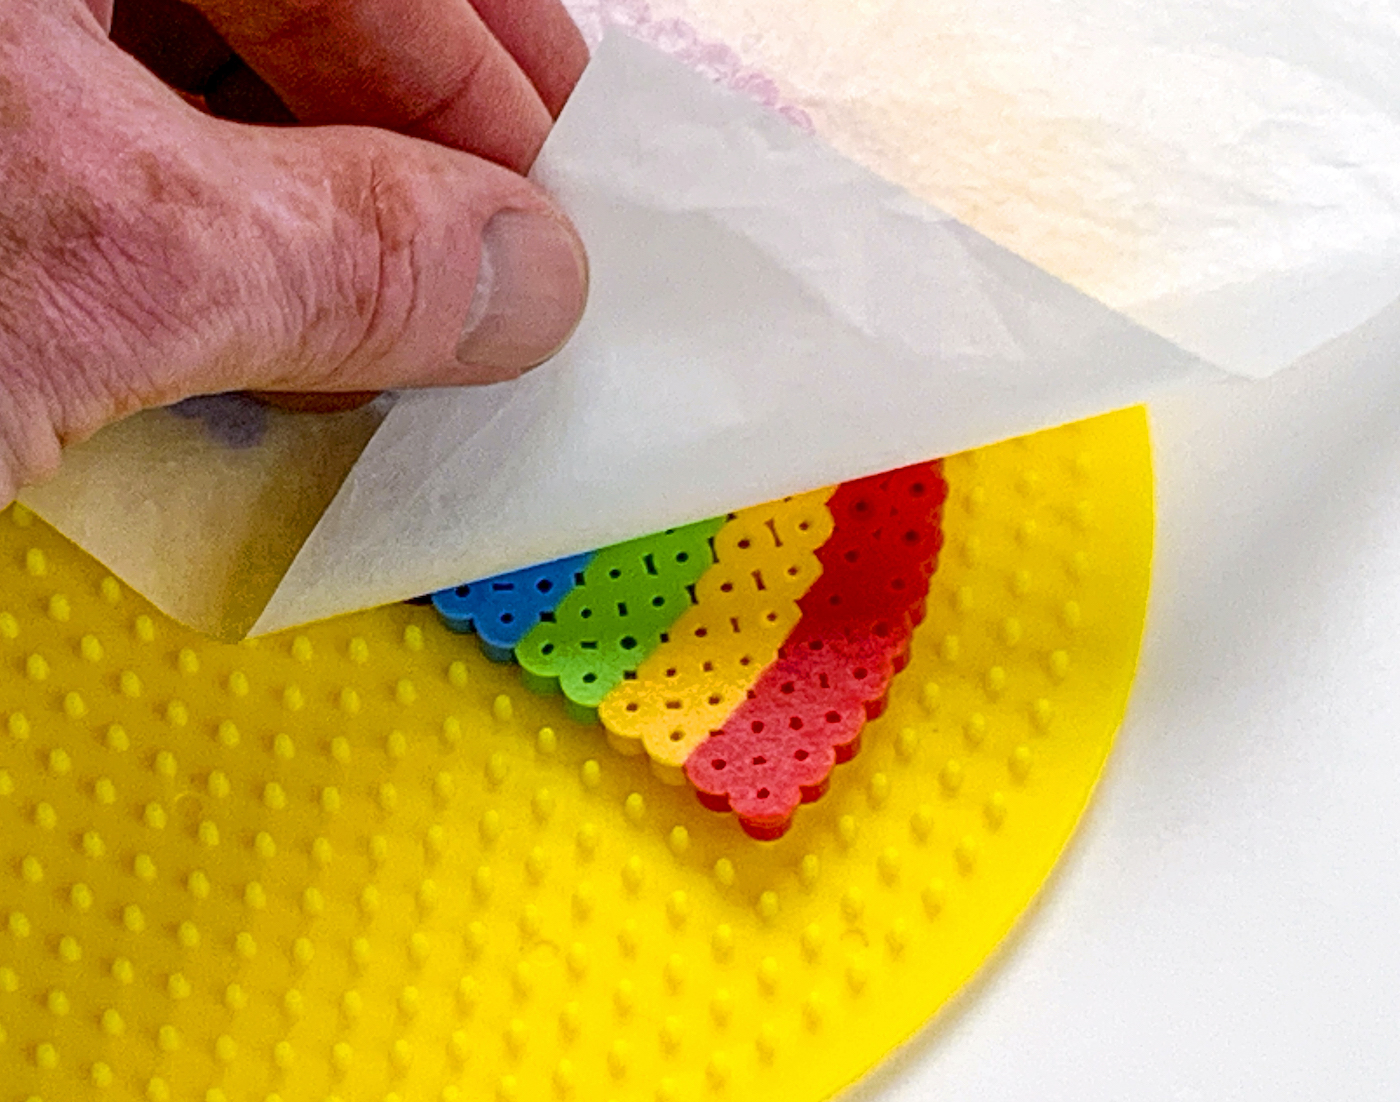
Another Note: some beads melt faster than others (clear melts faster than white, for example). So some holes might be larger than others. It’s okay! That’s part of the look of the project.
Iron the Other Side
Remove the bead design from the pegboard. Flip it over to the non-melted side and repeat the fusing process.
Remove the Paper
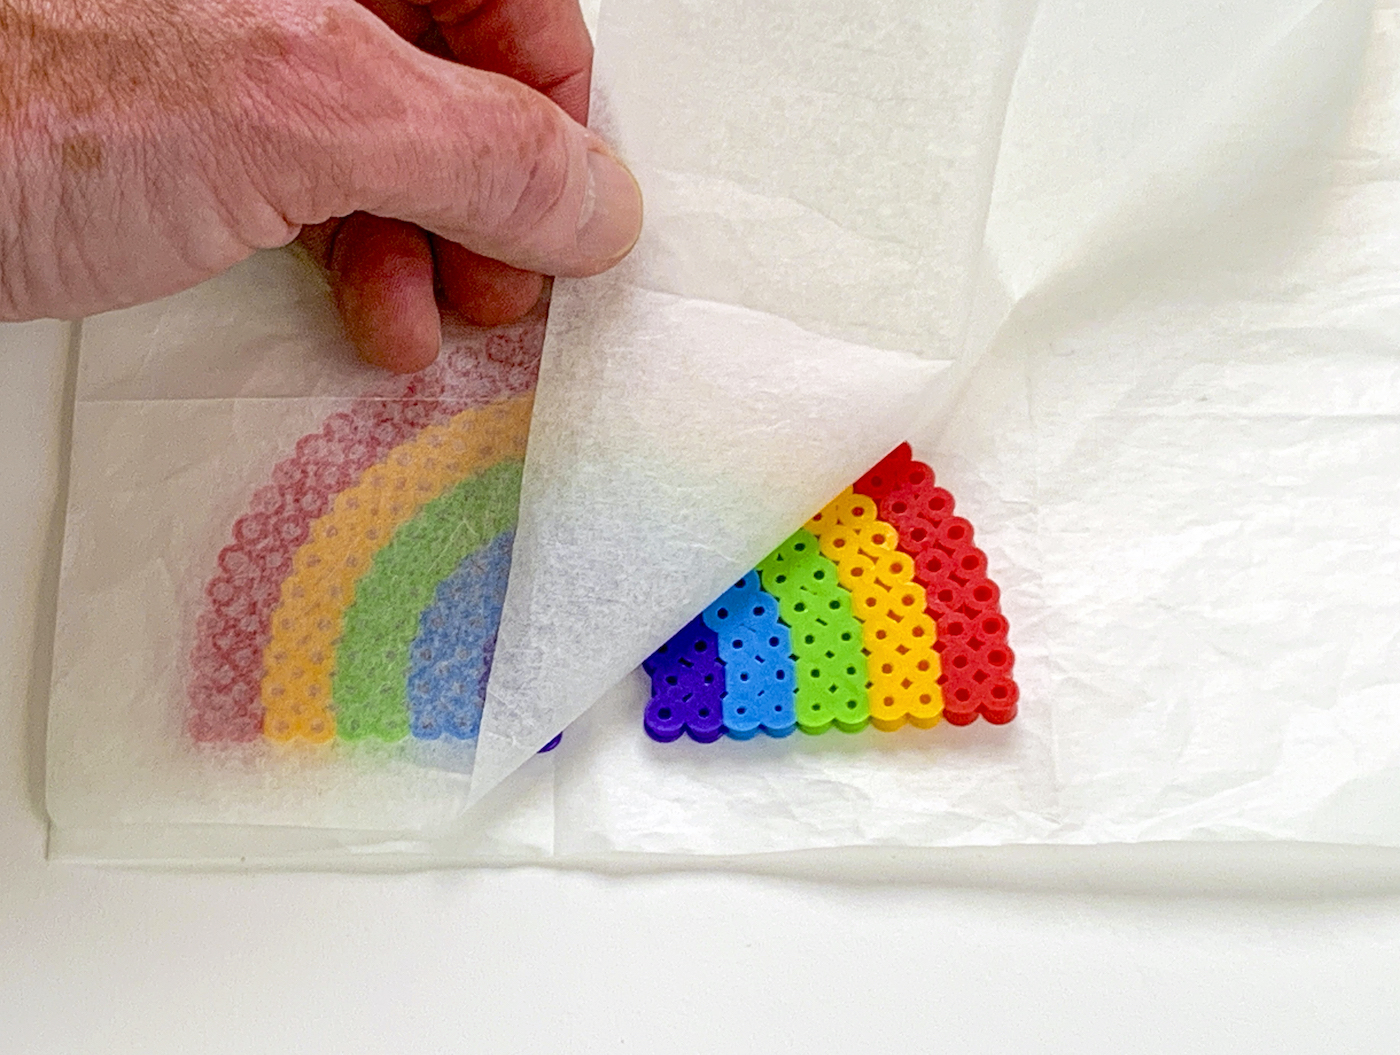
Let cool completely and remove the paper again (which is reusable). Some people pull the paper off after they iron the first side, but I just wait until the end and peel off both pieces. It’s up to you!
Now that you’ve had a refresher on how to melt the beads, you can get the patterns! Keep on reading.
Kuromi Hama Beads
- A few of these patterns are larger than a 29 x 29 pegboard, so you’ll either need a extra large pegboard (49 x 69 tall) or to put multiple square peg boards together to form a larger “canvas.”
- You’ll see a couple of the pattern backgrounds below aren’t white – that’s simply to give contrast so you can see where all the white beads should go. You don’t need to add the background (but you can if you want to).
- In addition to square pegboards, you’ll see a hexagon pegboard. These are fun to have in your arsenal if you plan to do a lot of perler-ing.
- You don’t have to stick to my color choices. A lot of times I just use what I have on hand, so feel free to customize.
- I typically start with easier, smaller patterns in my list and then move on to the more difficult ones. If you’re looking for something a bit more advanced, just keep scrolling!
Mini Kuromis
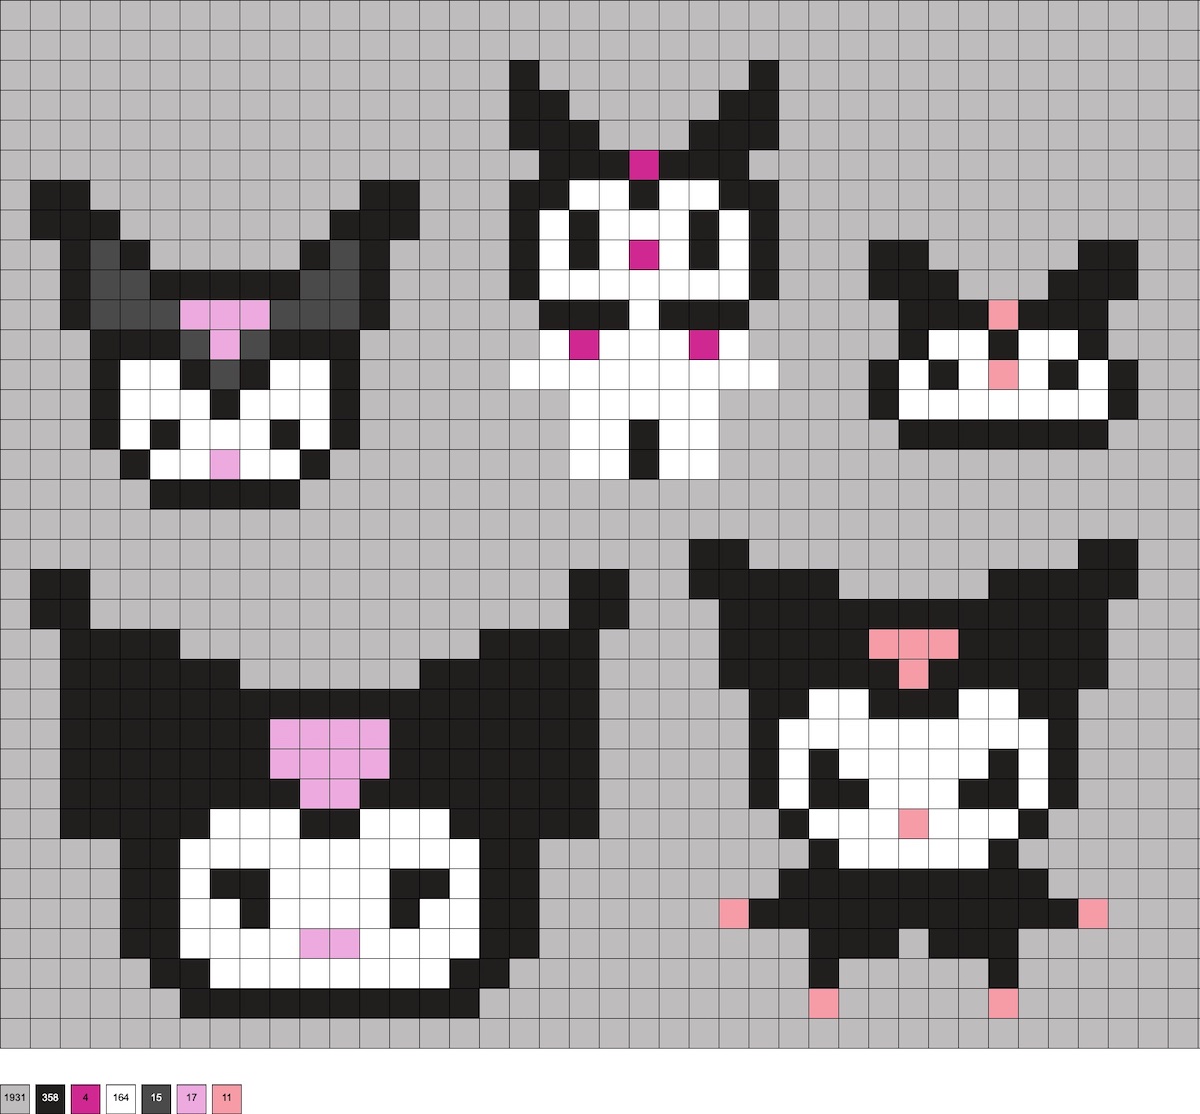
If you’re looking for something small for a magnet, keychain, earrings, or similar, here are five mini patterns you can make on a 29 x 29 square board.
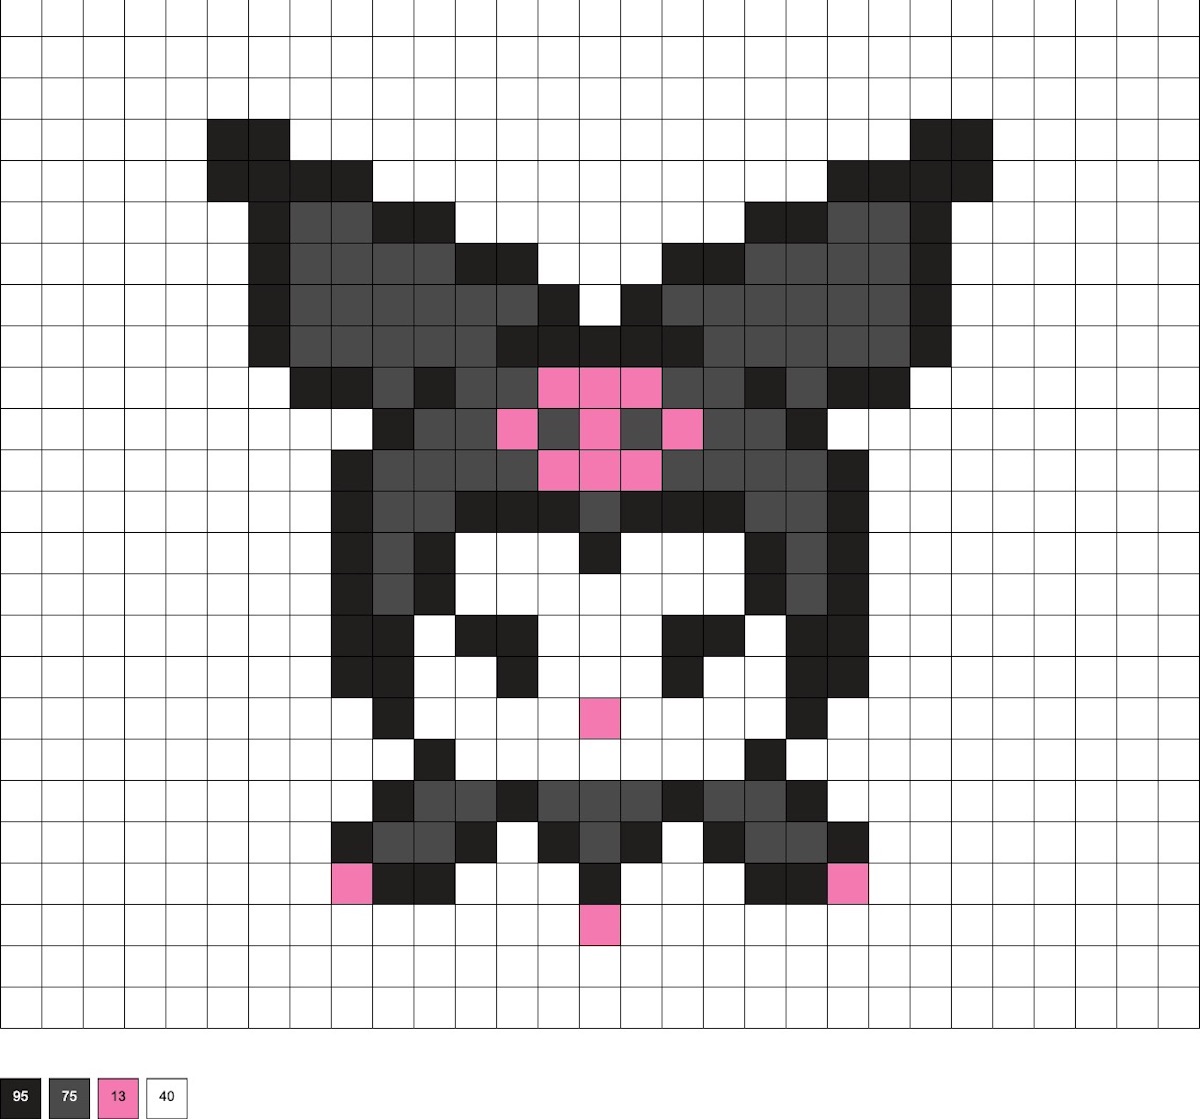
Small Kuromi Head
This pattern uses 95 black, 75 dark gray, 13 pink, and 40 white beads.
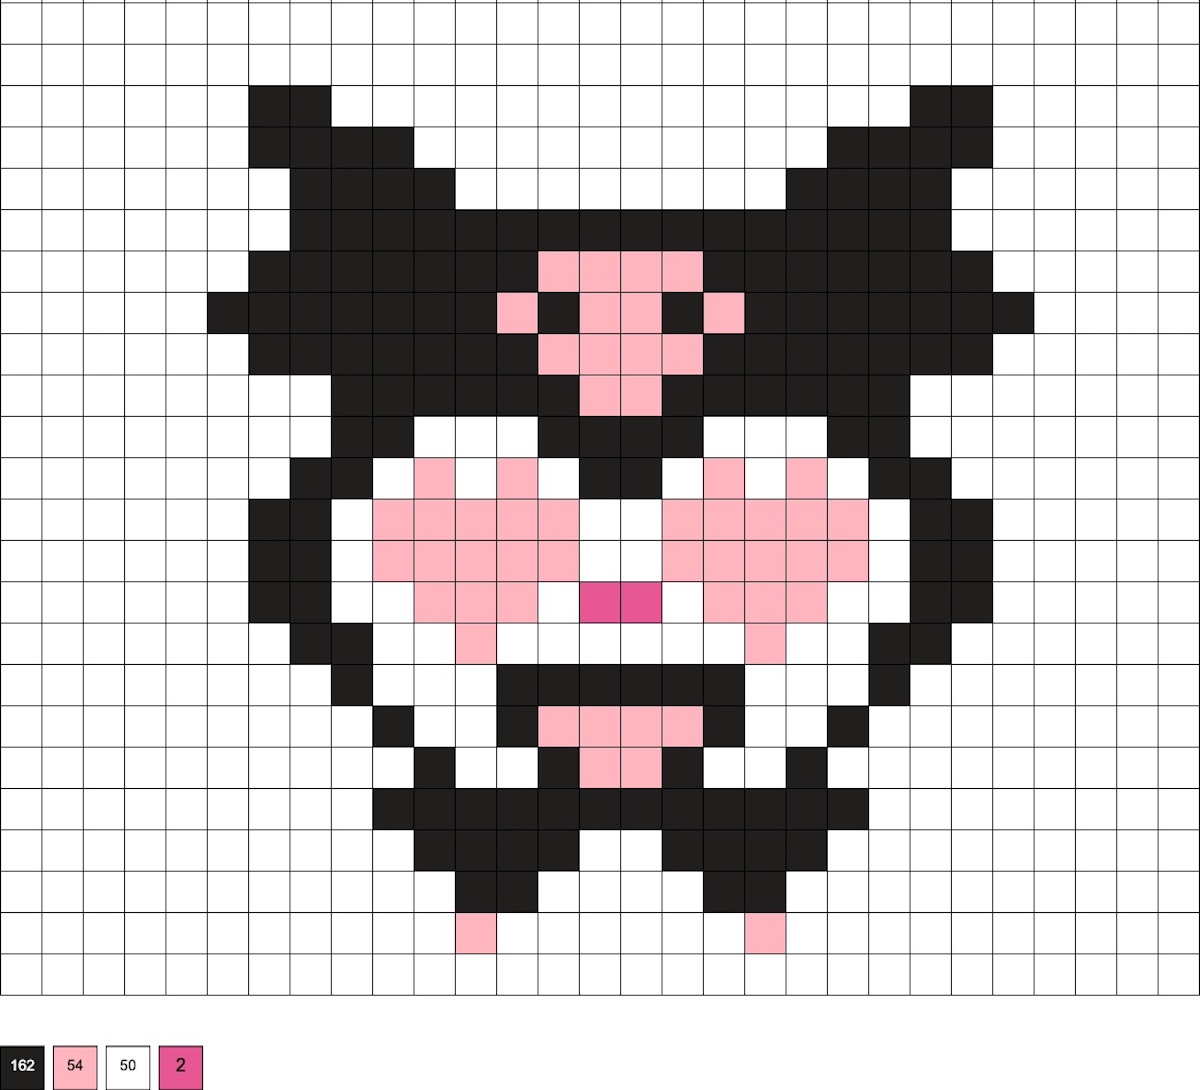
Heart Eyes and Tongue Out
This pattern uses 162 black, 54 flamingo, 50 white, and 2 bubble gum beads.
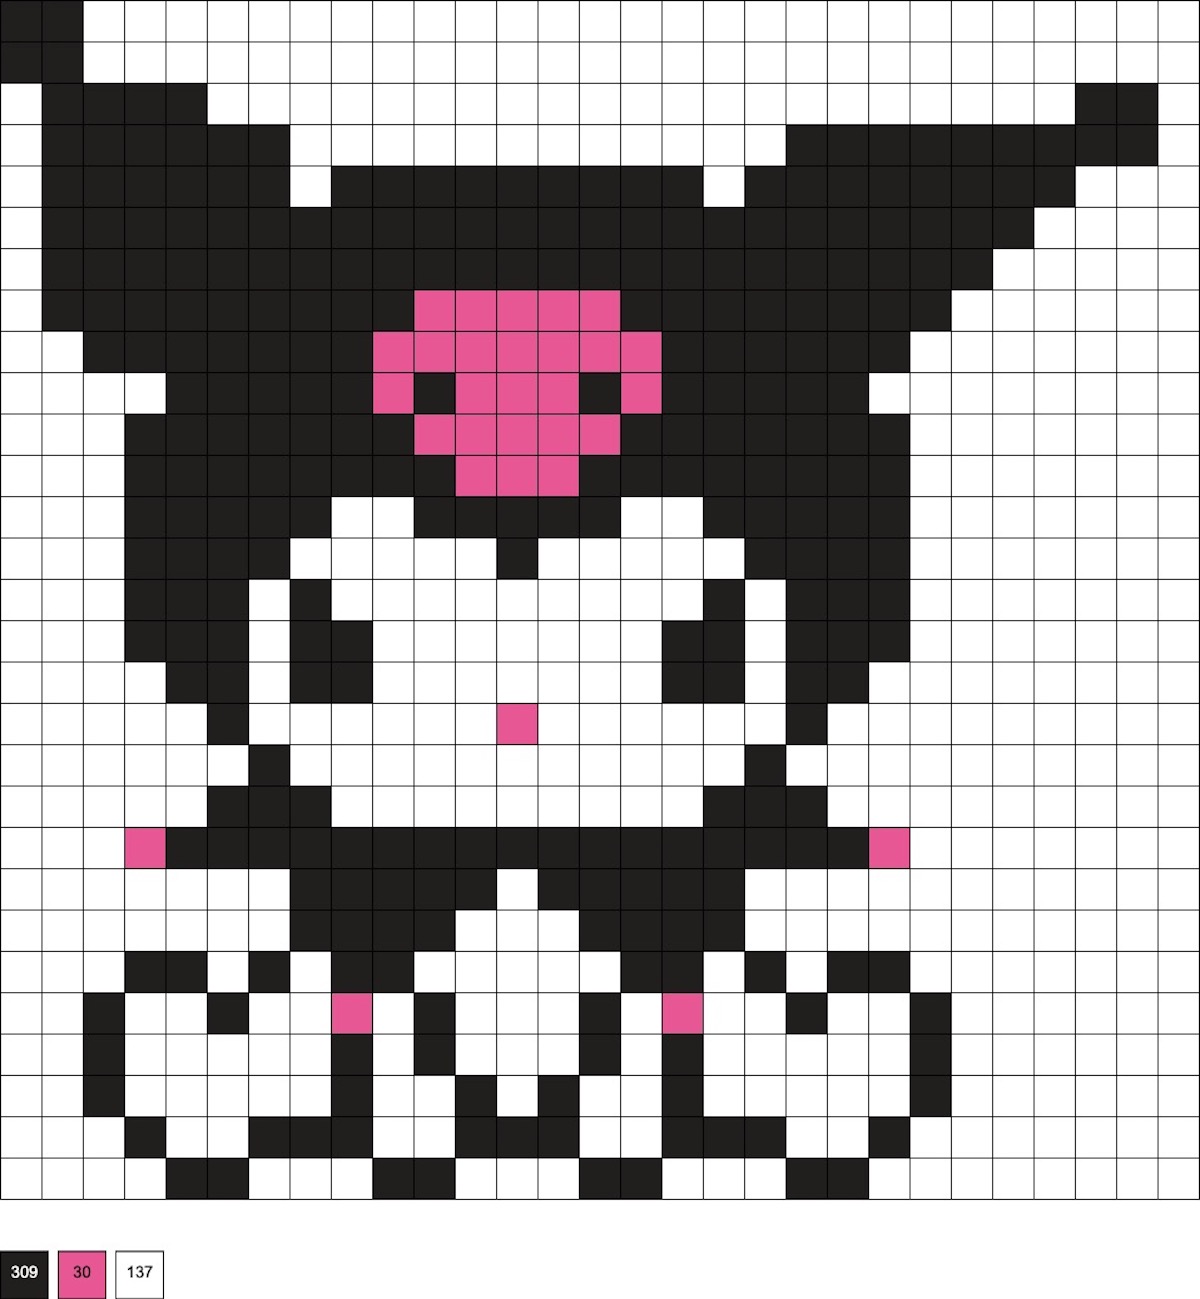
Sitting Kuromi
This pattern uses 309 black, 30 pink, and 137 white beads.
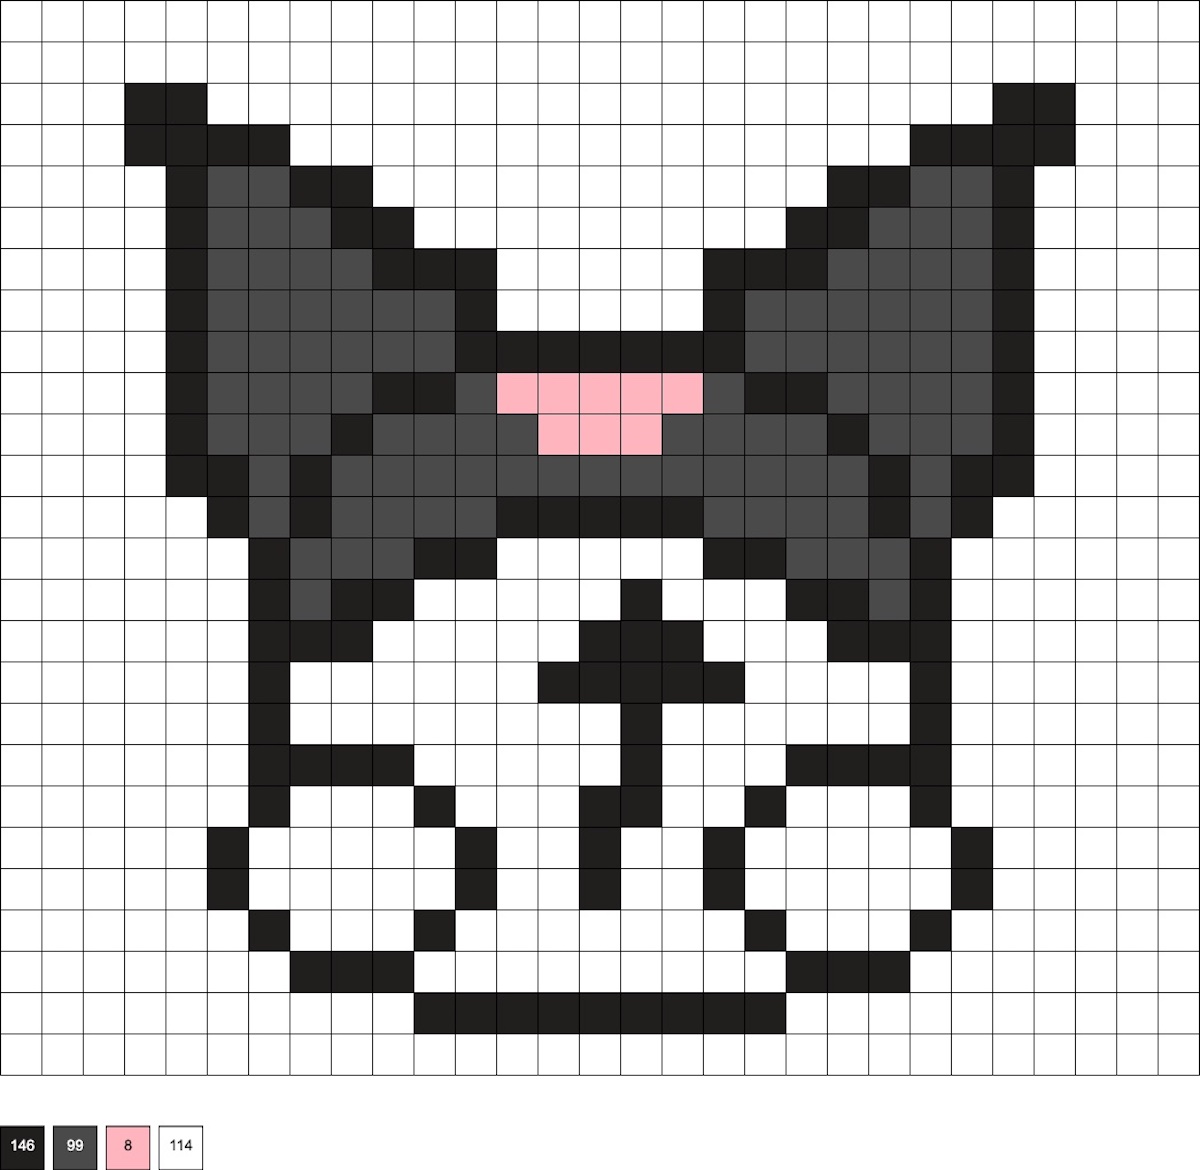
Kuromi Back and Devil Tail
This pattern uses 146 black, 99 dark gray, 8 flamingo, and 114 white beads.
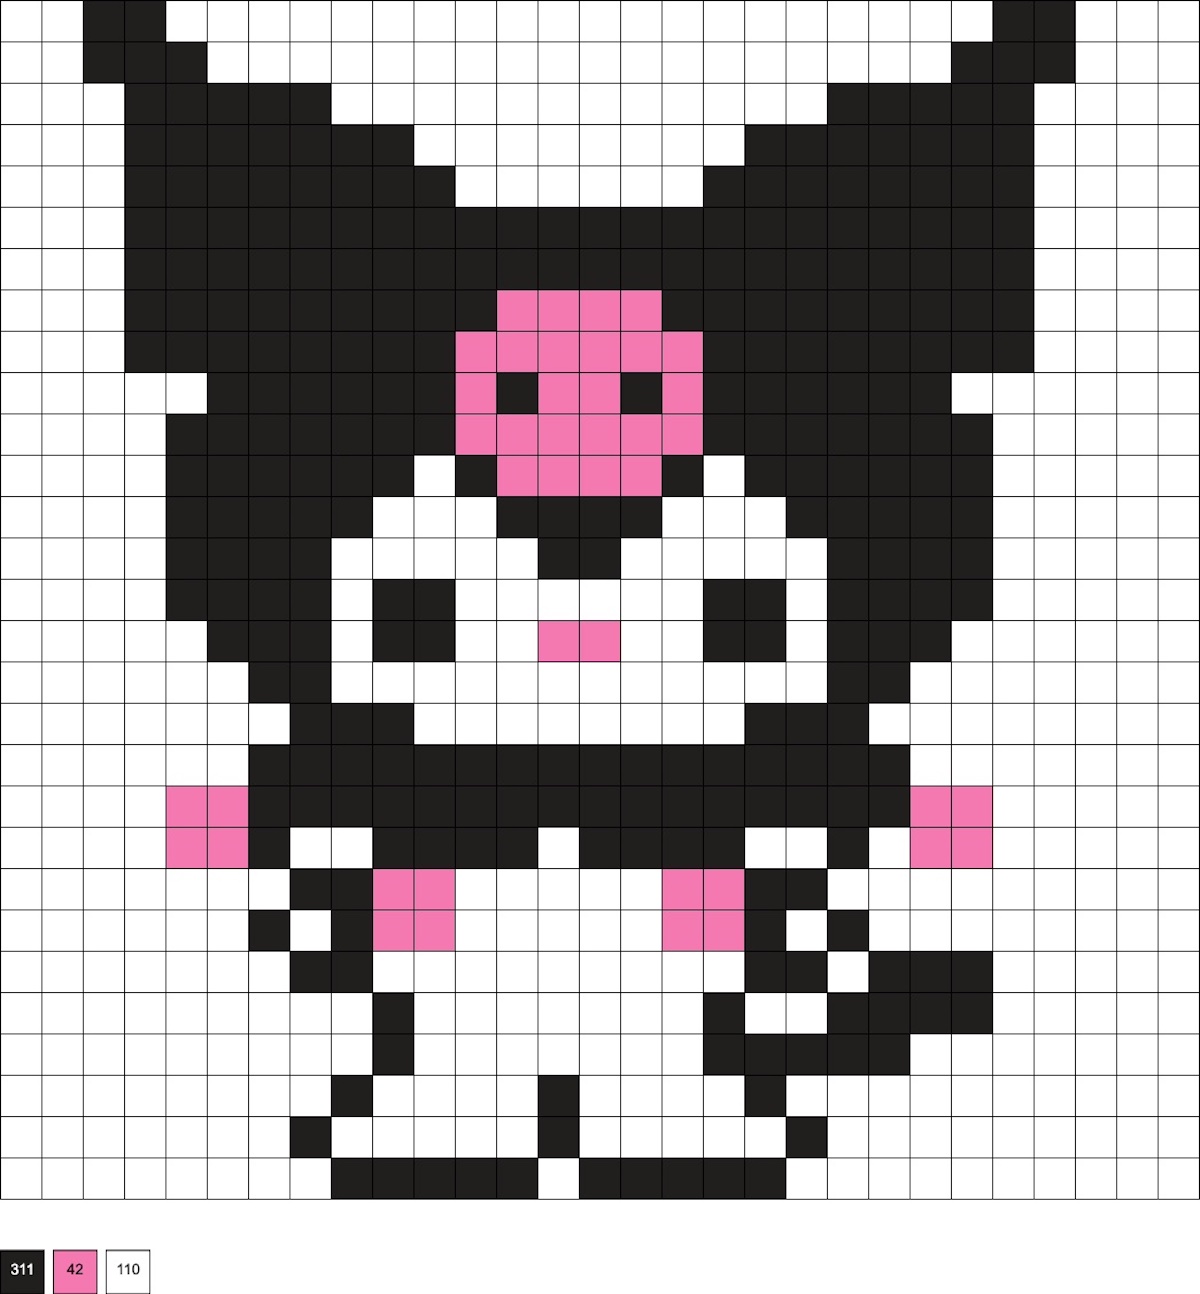
Medium Kuromi
This pattern uses 311 black, 42 pink, and 110 white beads.
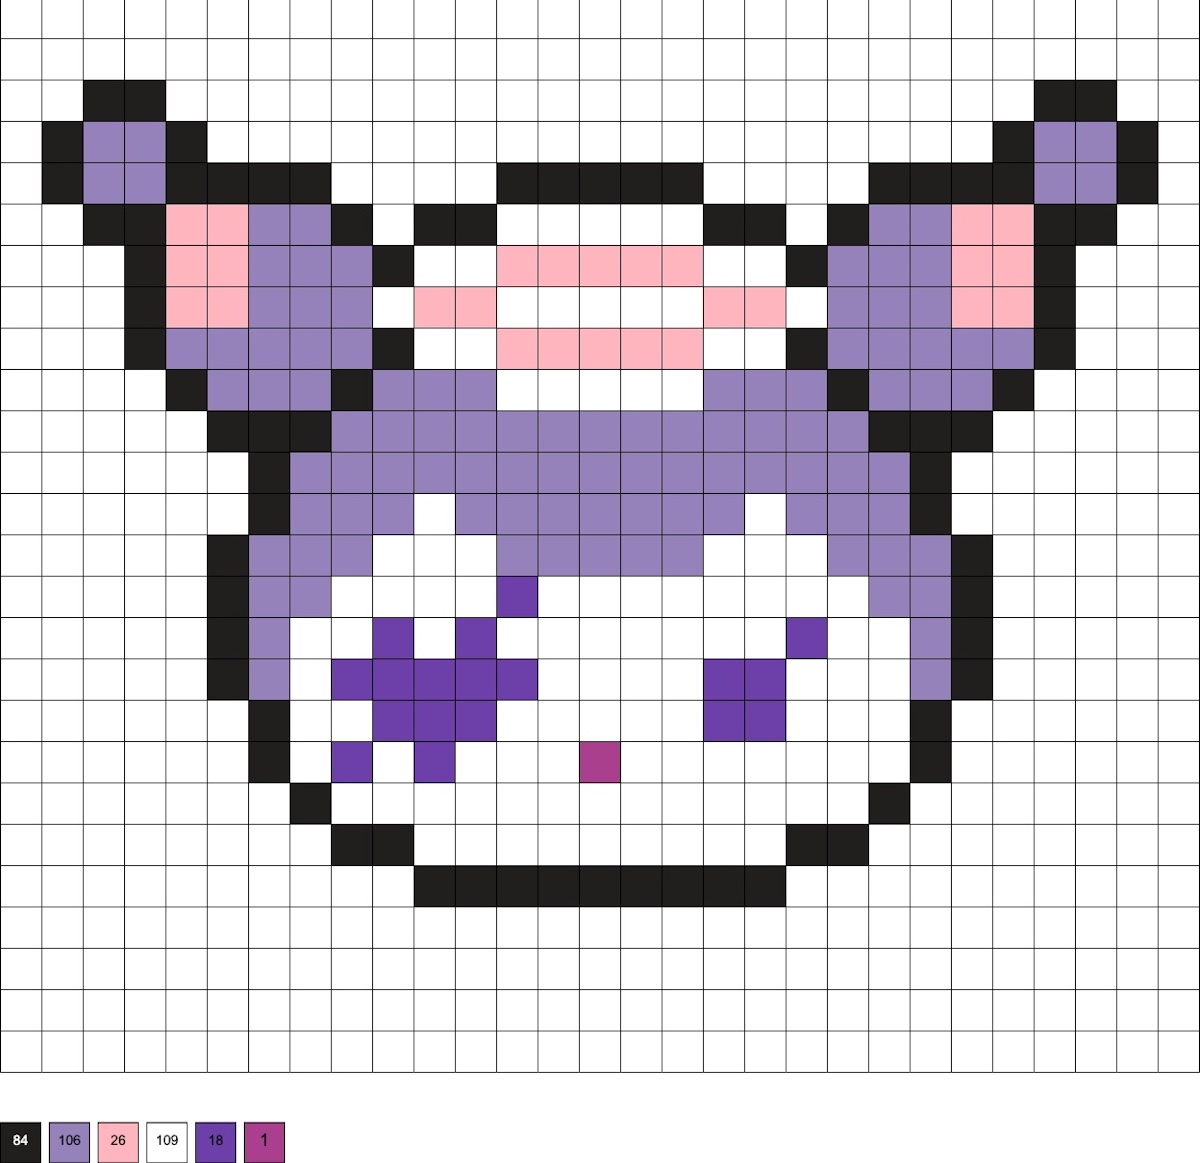
Purple Pirate
This pattern uses 84 black, 106 pastel lavender, 26 blush, 109 white, 18 purple, and 1 raspberry bead.
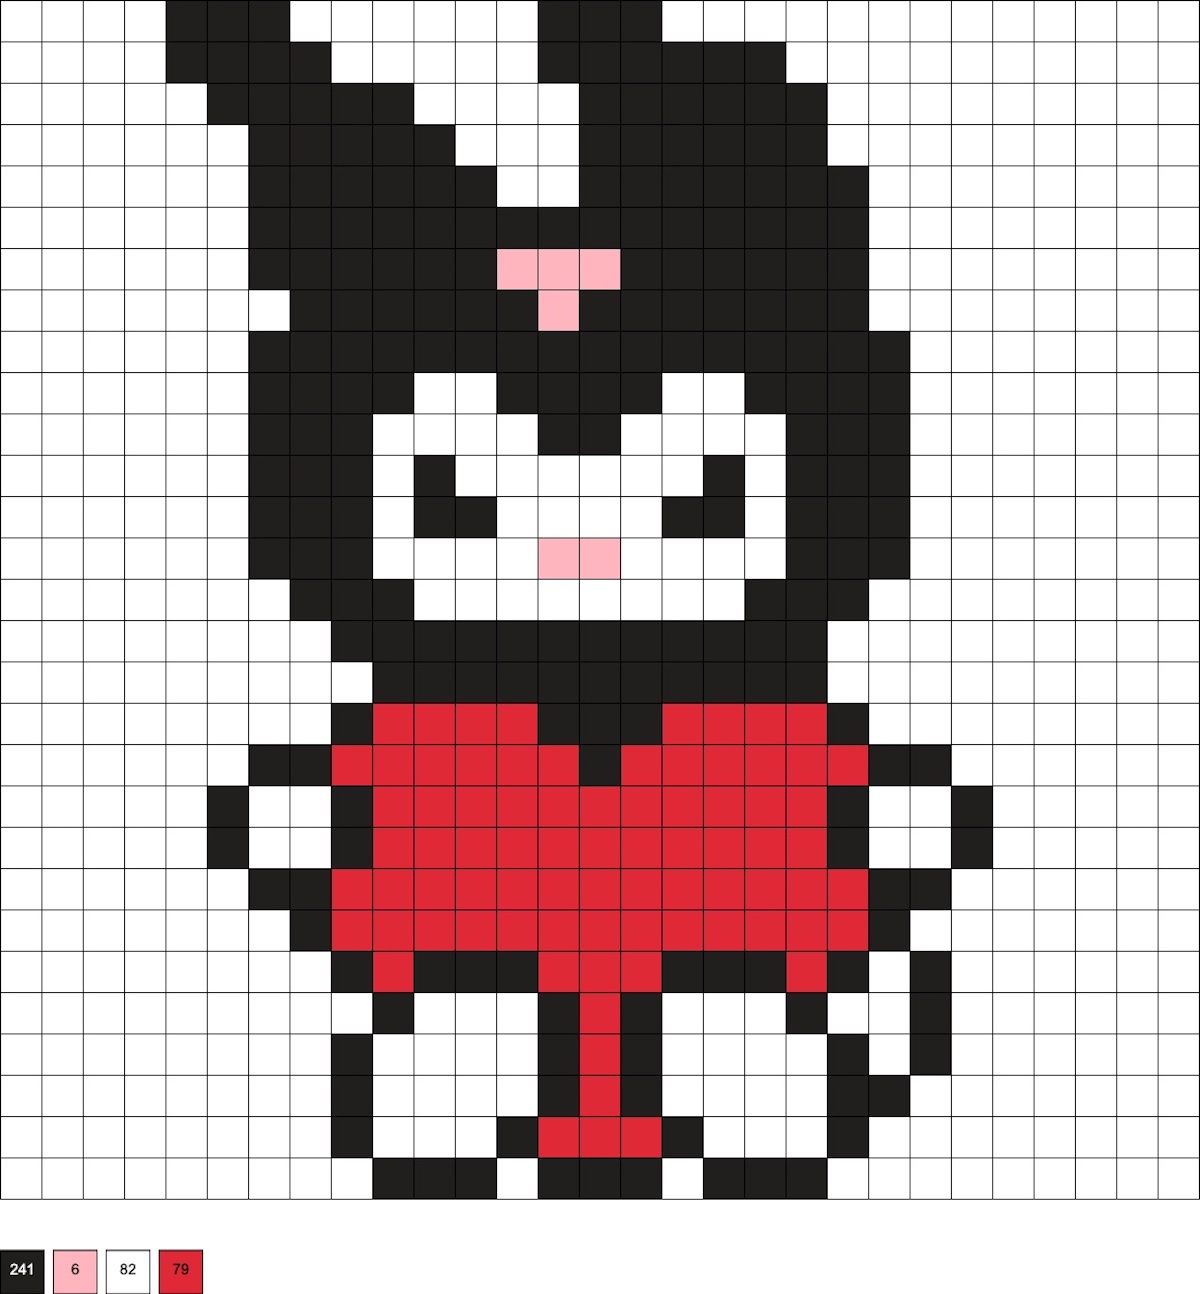
Holding a Red Heart
This pattern uses 241 black, 6 flamingo, 82 white, and 79 red beads.
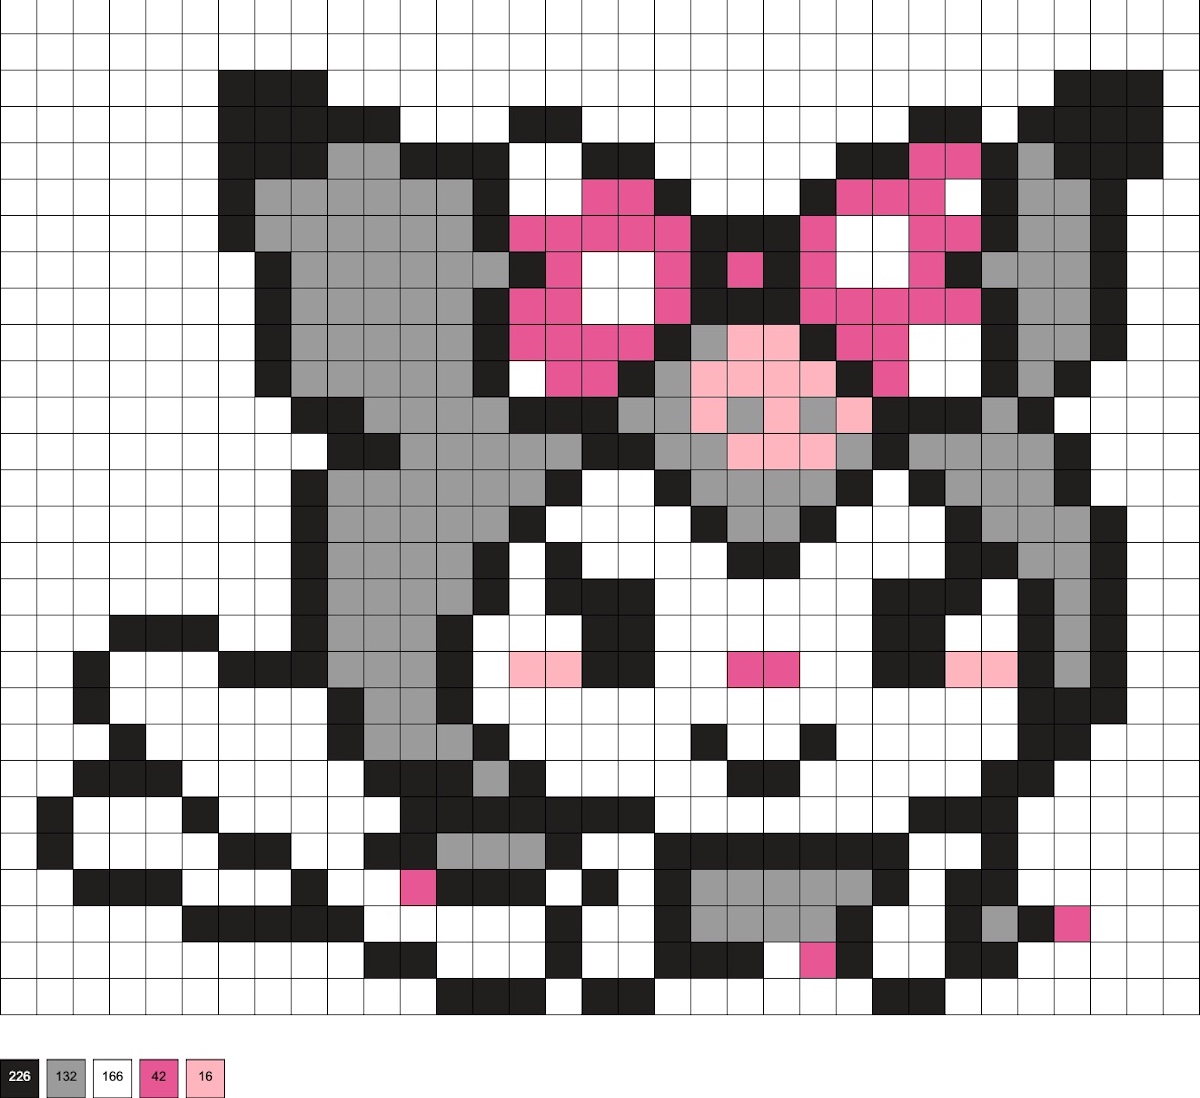
Laying Down with Polka Dot Bow
This pattern uses 226 black, 132 gray, 166 white, 42 pink, and 16 flamingo beads.
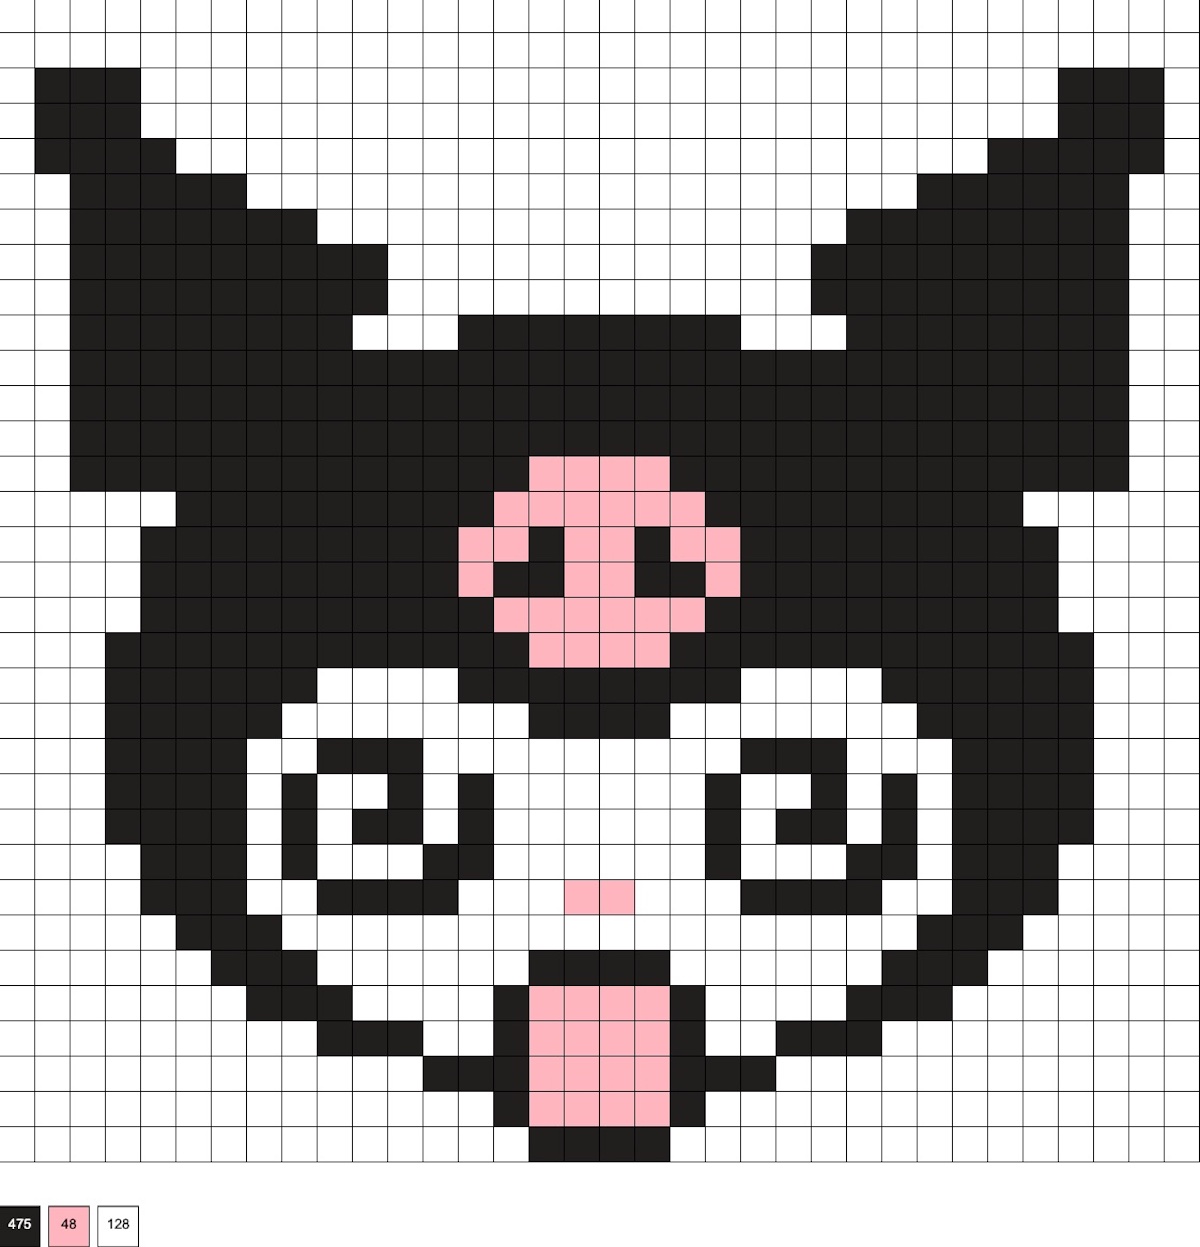
Spiral Eyes
This pattern uses 475 black, 48 flamingo, and 128 white beads.
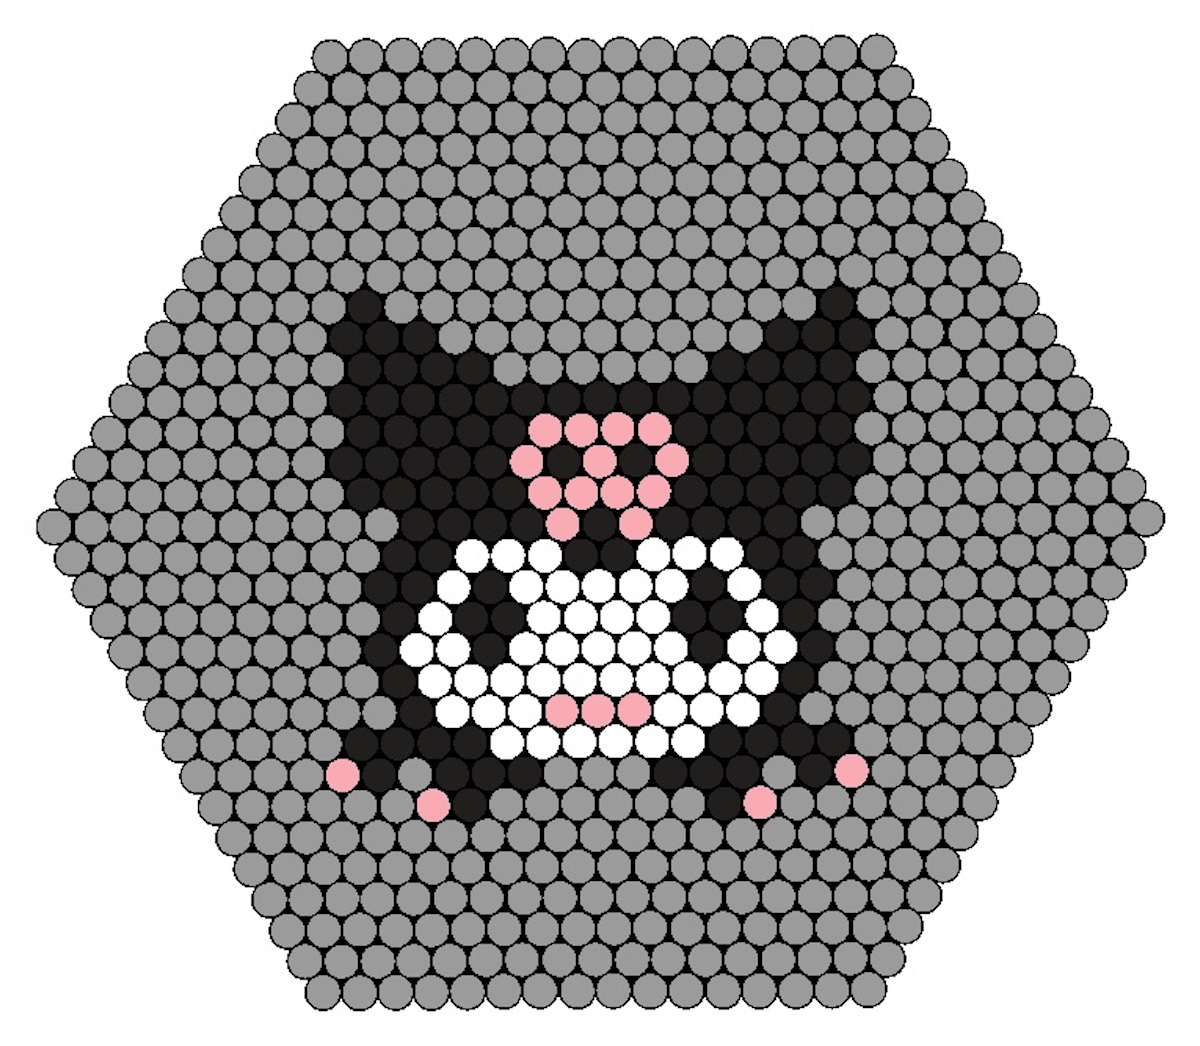
Hexagon Kuromi
Grab a large hexagon pegboard to make this pattern.
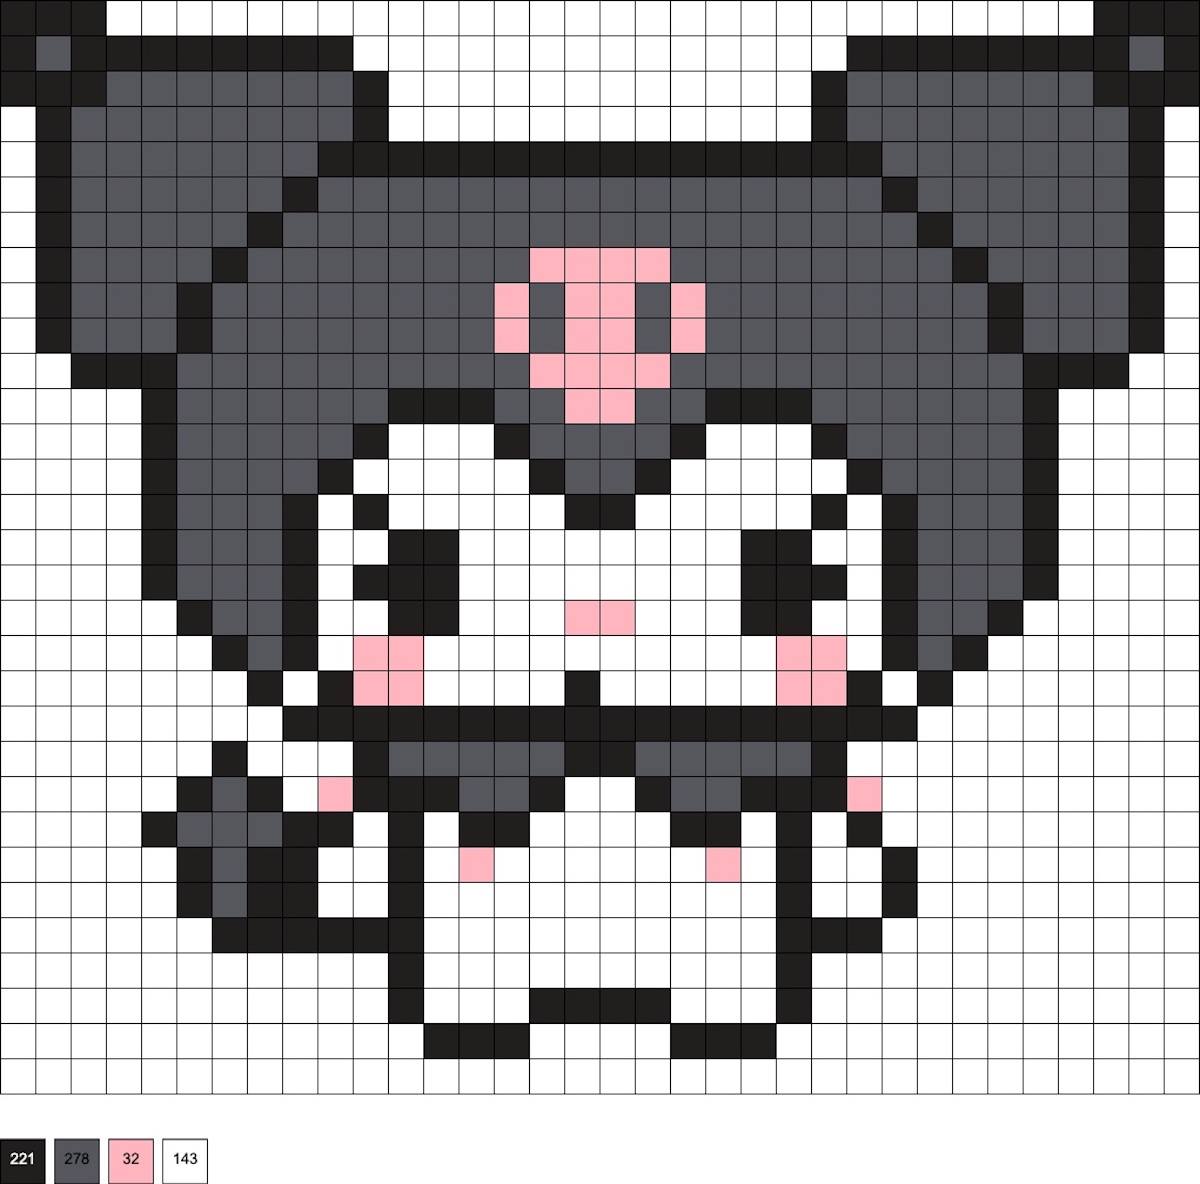
Large Kuromi
This pattern uses 221 black, 278 dark gray, 32 flamingo, and 143 white beads.
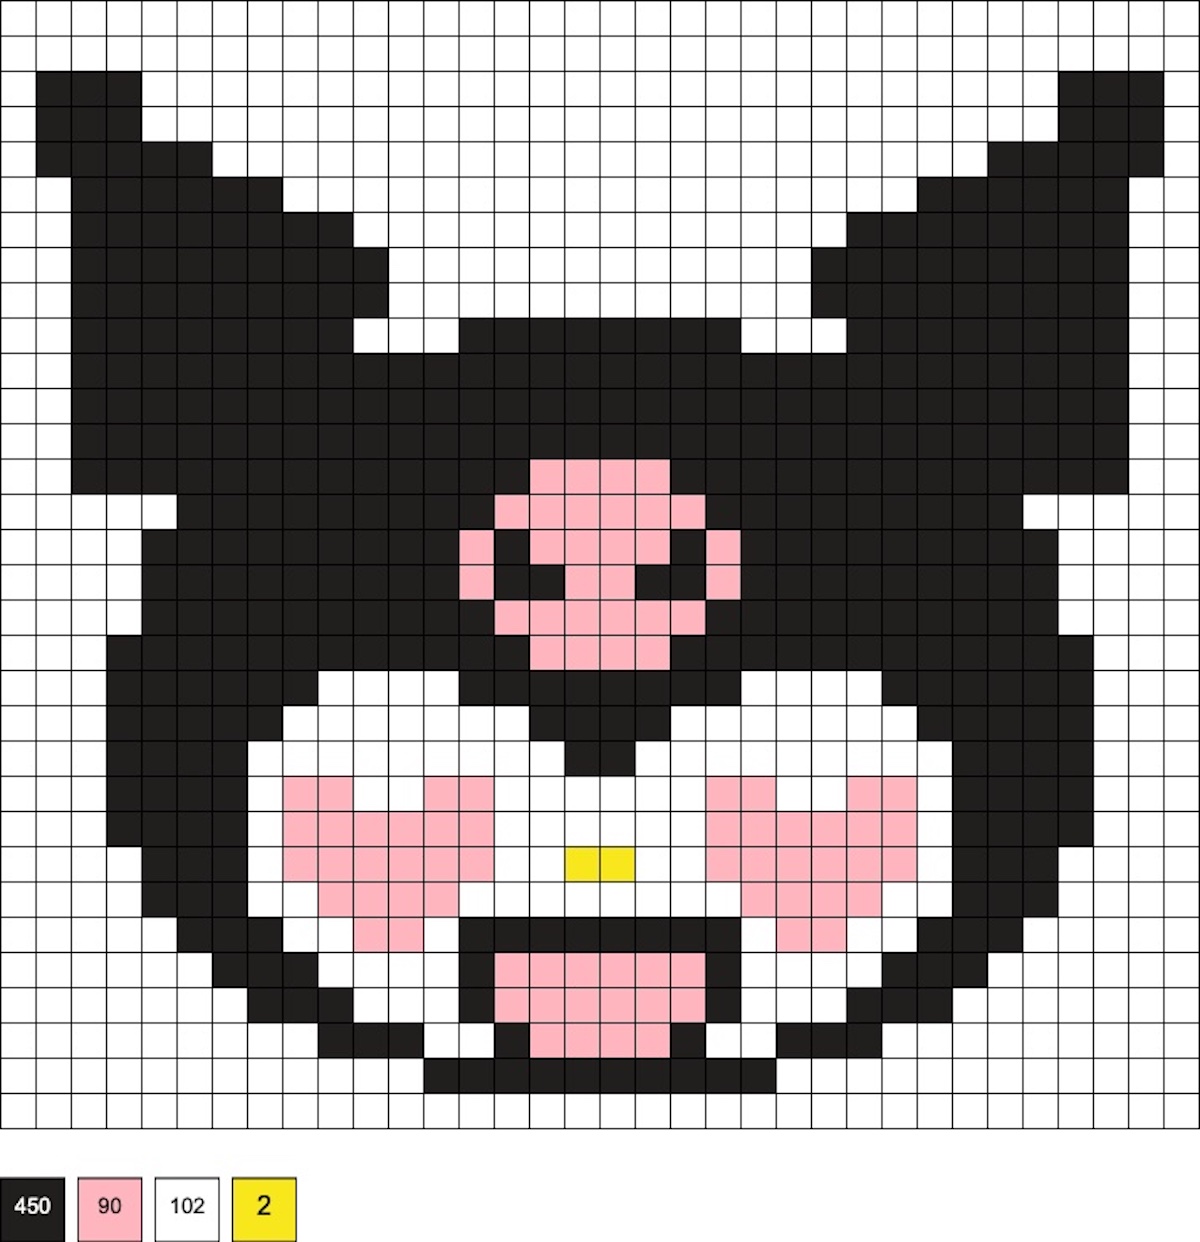
Heart Eyes
This pattern uses 450 black, 90 flamingo, 102 white, and 2 yellow beads.
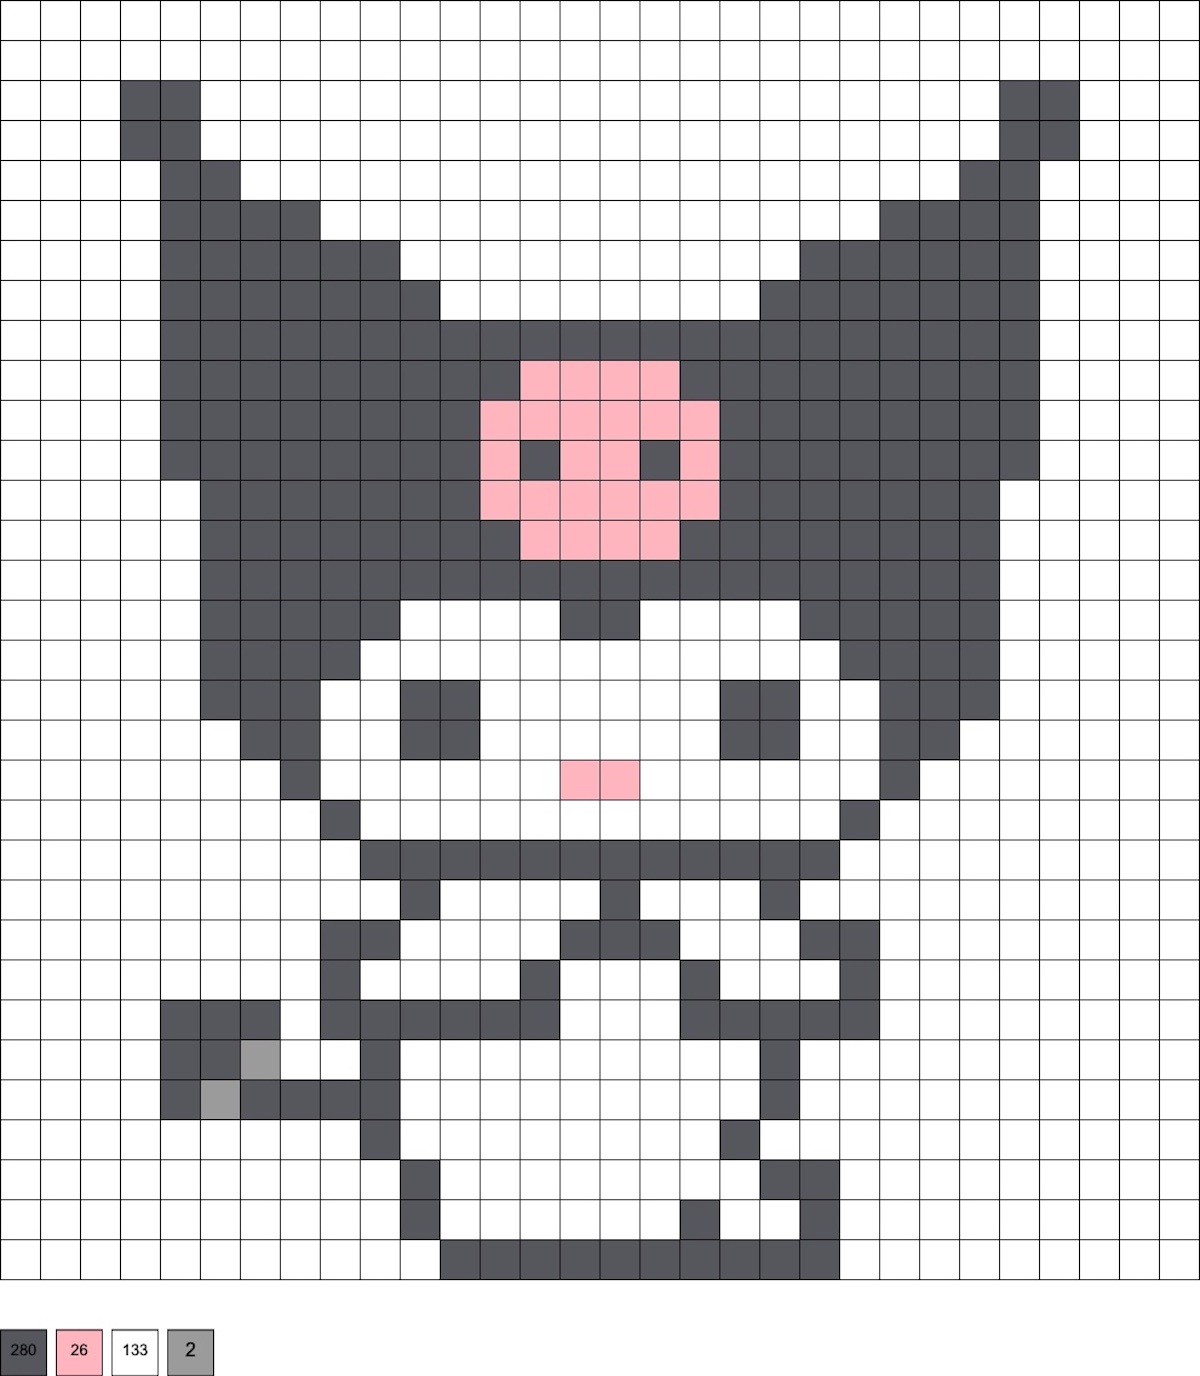
Pink and Gray
This pattern uses 280 dark gray, 26 flamingo, 133 white, and 2 clear beads to hold the tail on.
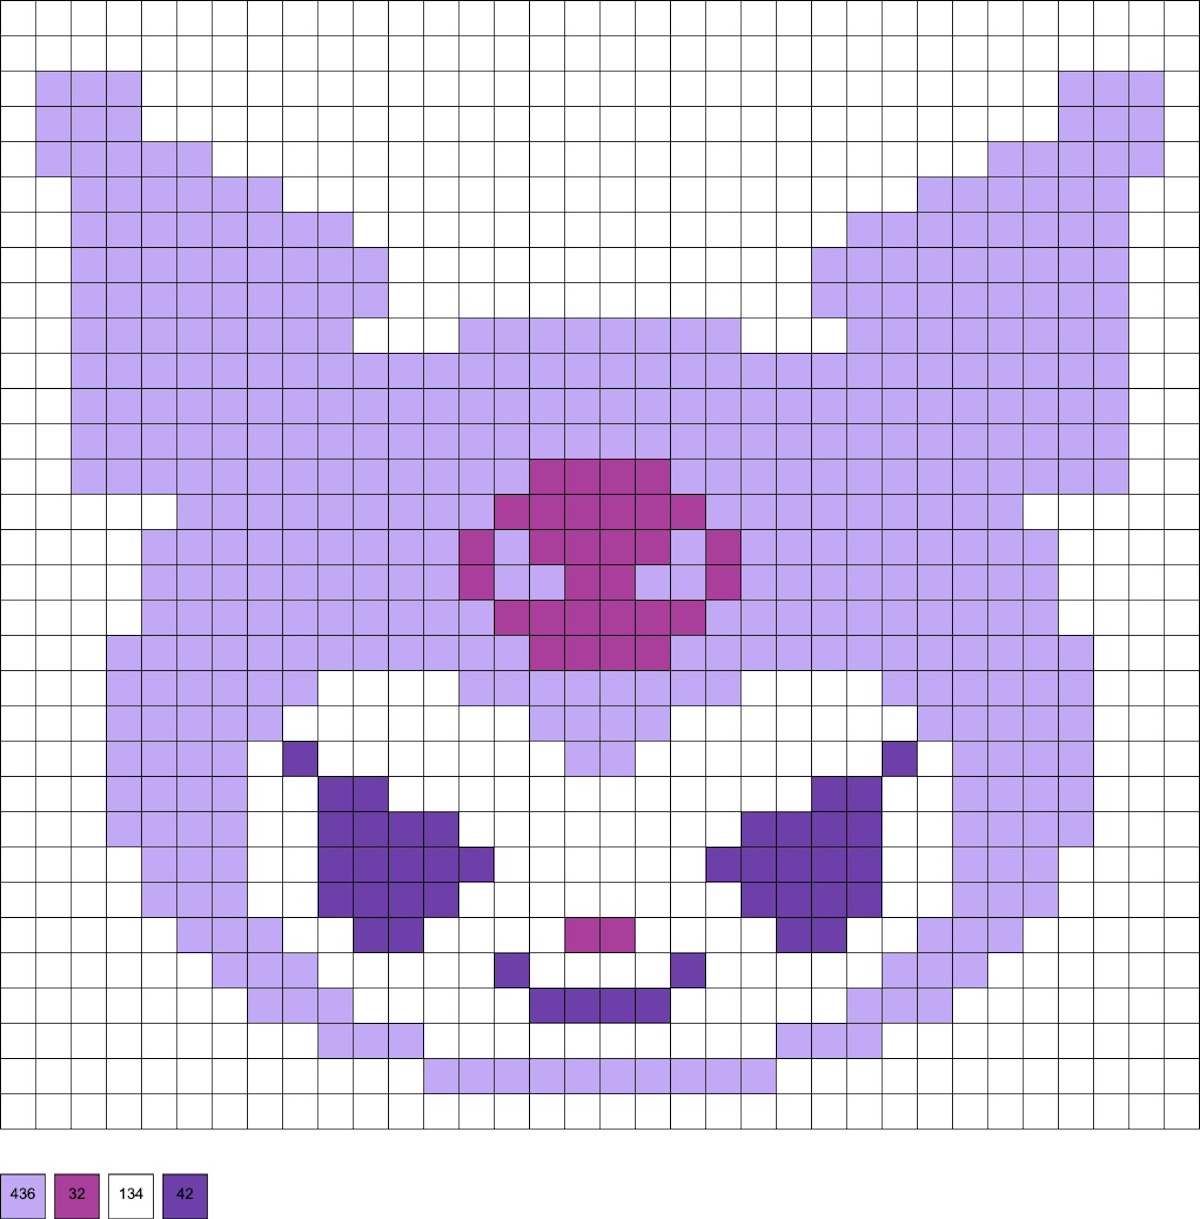
Purple and Plum
This pattern uses 436 pastel lavender, 32 raspberry, 134 white, and 42 purple beads.
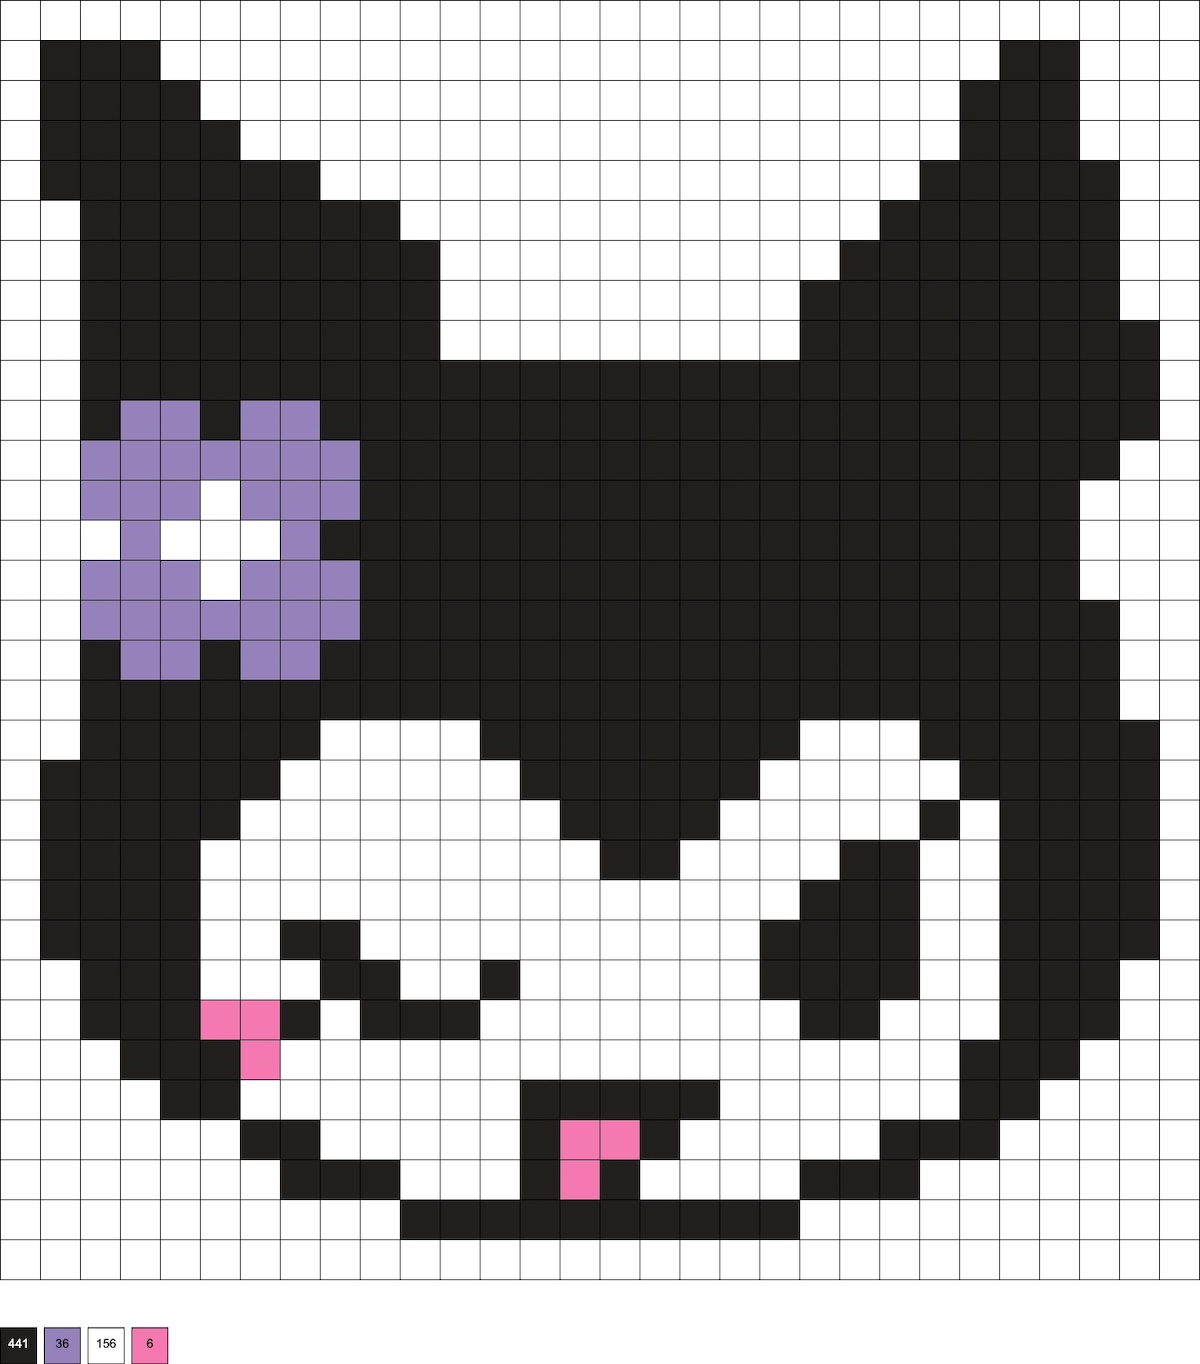
Winking with a Flower
This pattern uses 441 black, 36 pastel lavender, 156 white, and 6 pink beads.
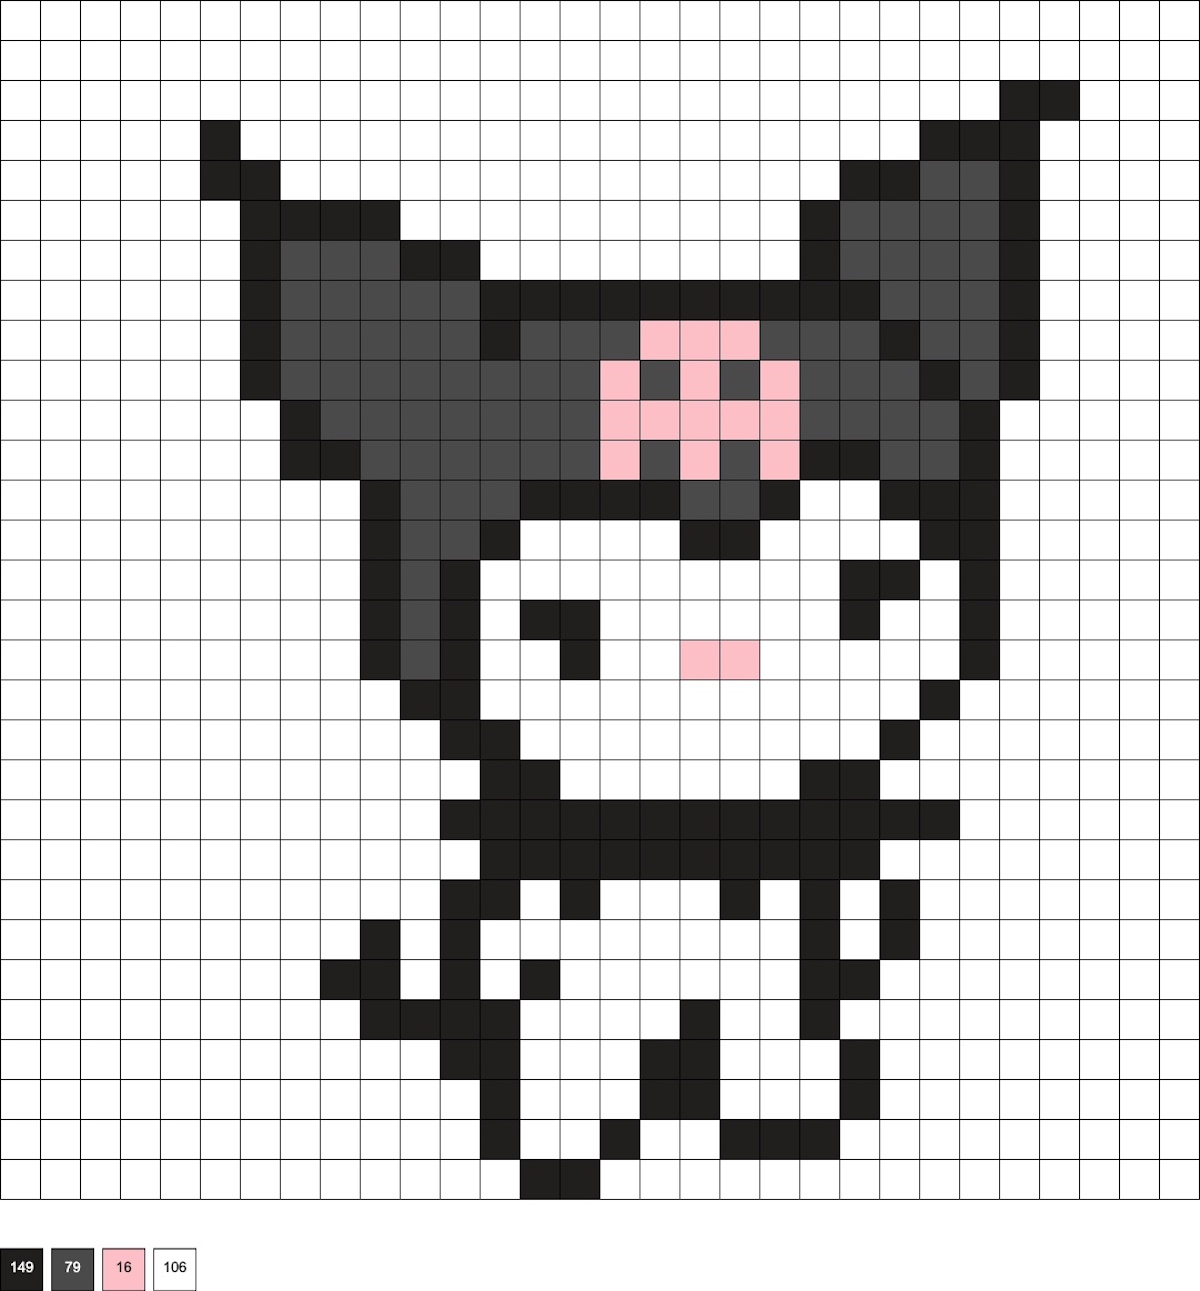
Side View
This pattern uses 149 black, 79 dark gray, 16 flamingo, and 106 white beads.
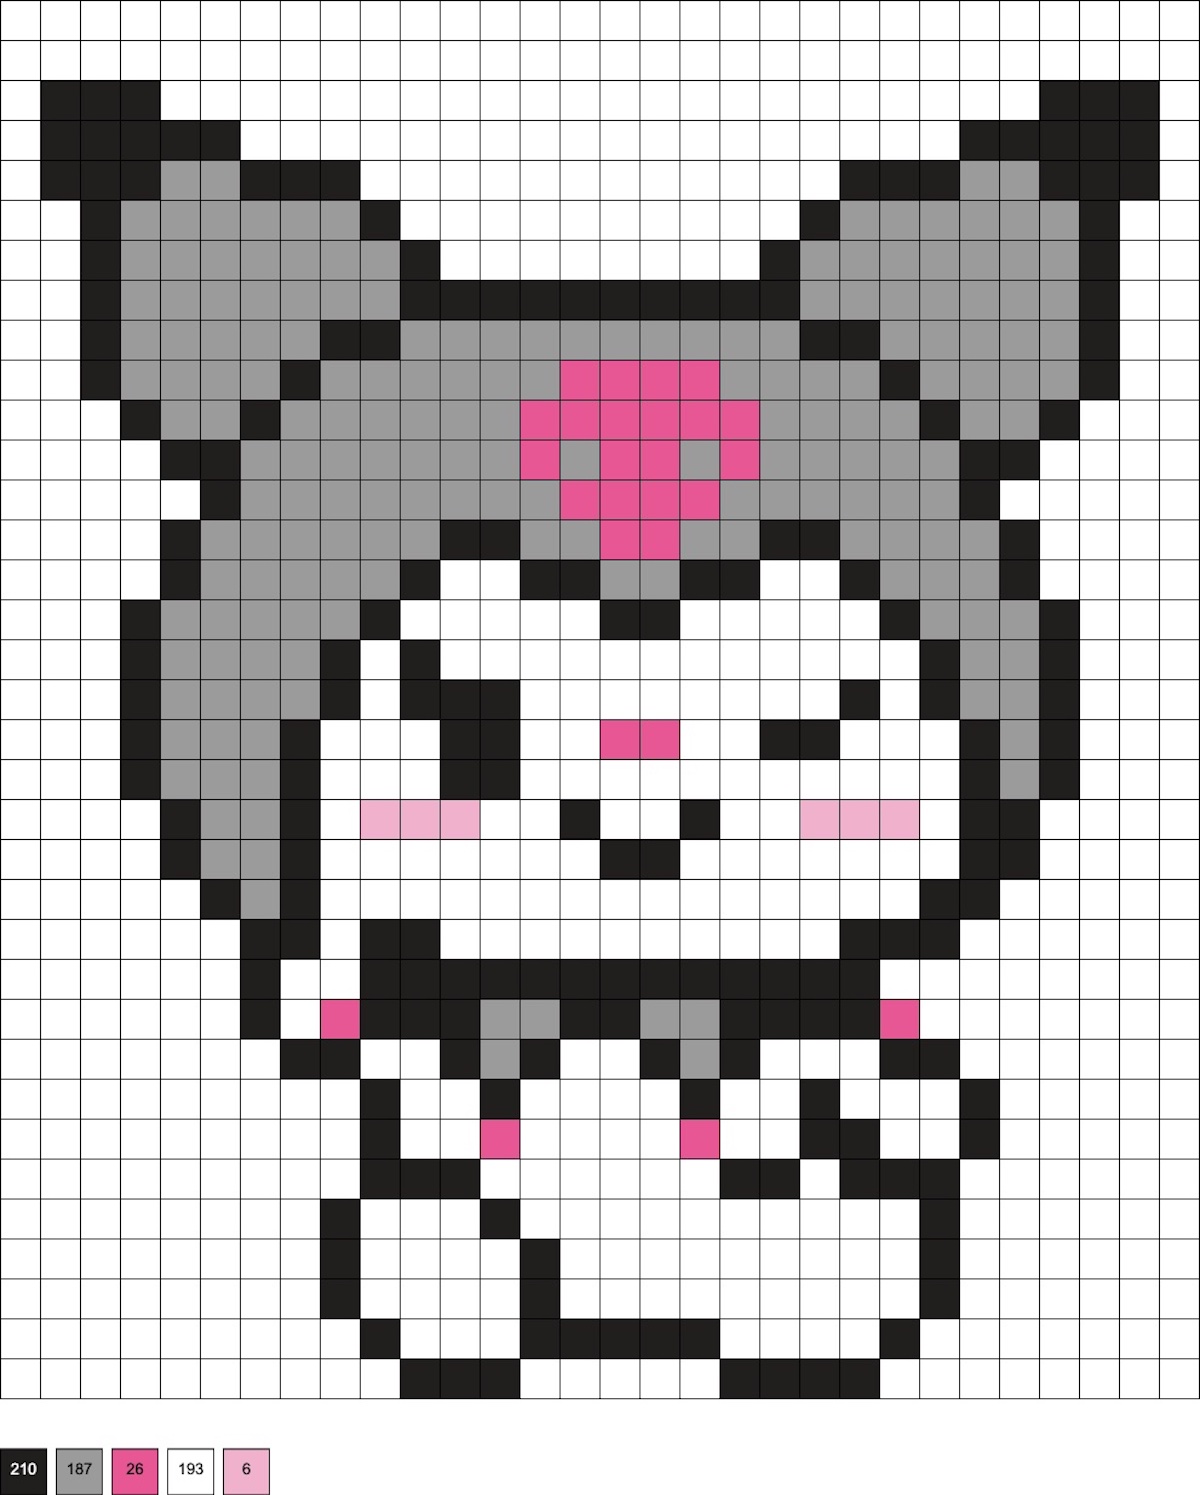
Sitting and Winking
This pattern uses 210 black, 187 gray, 26 pink, 193 white, and 6 flamingo beads.
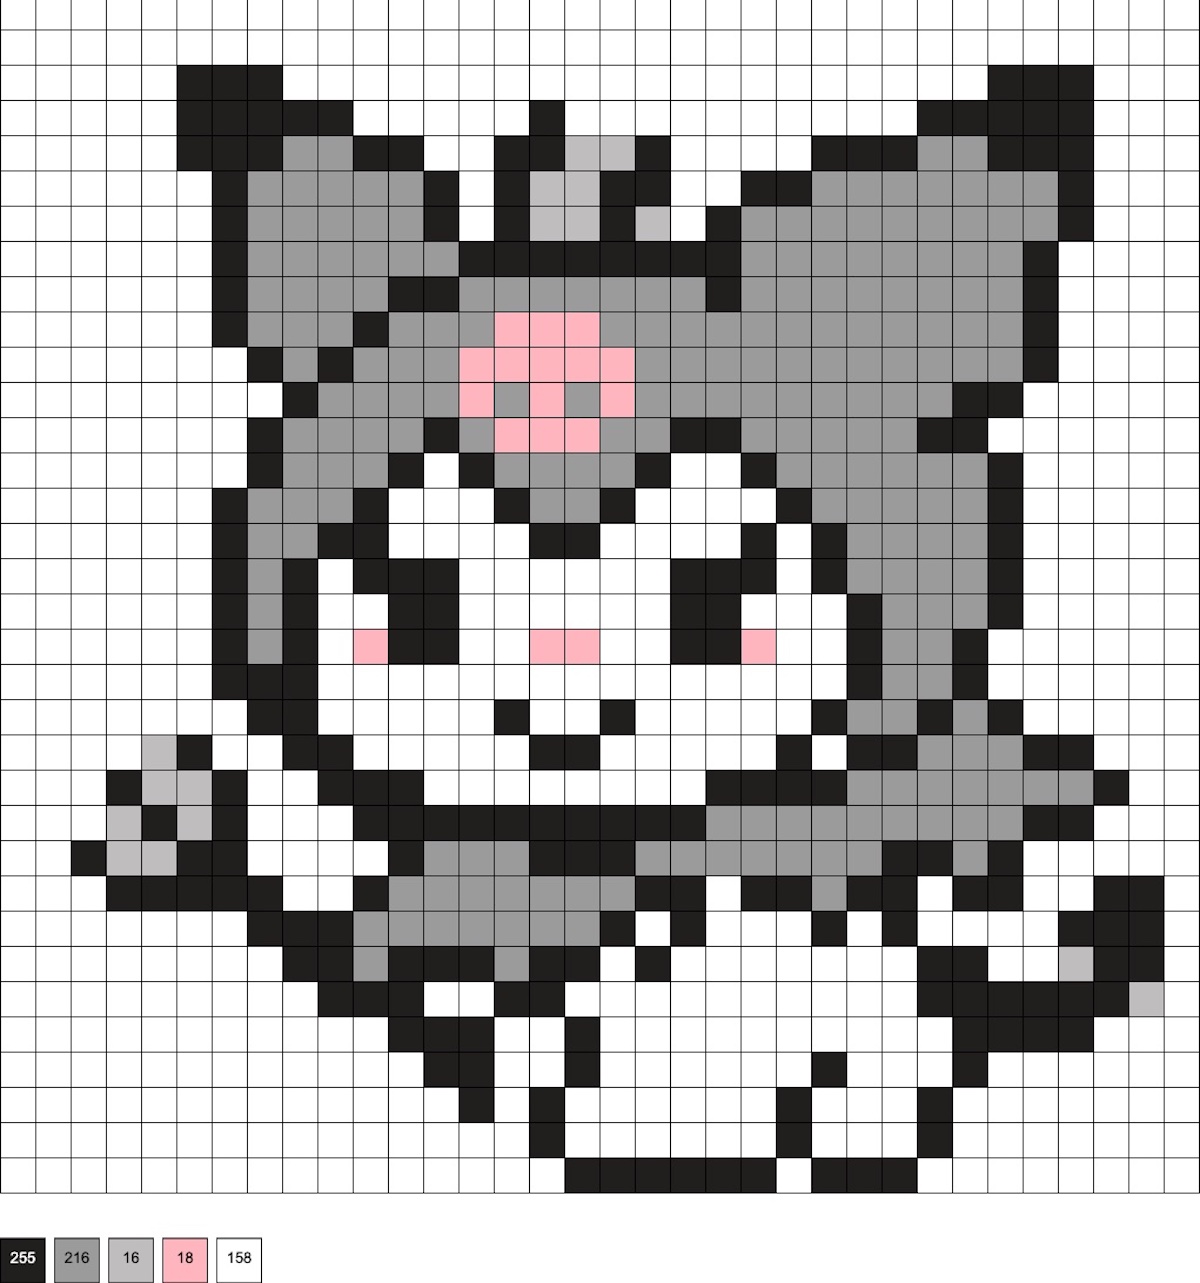
Holding a Pitchfork
This pattern uses 255 black, 216 gray, 16 clear, 18 blush, and 158 white beads.
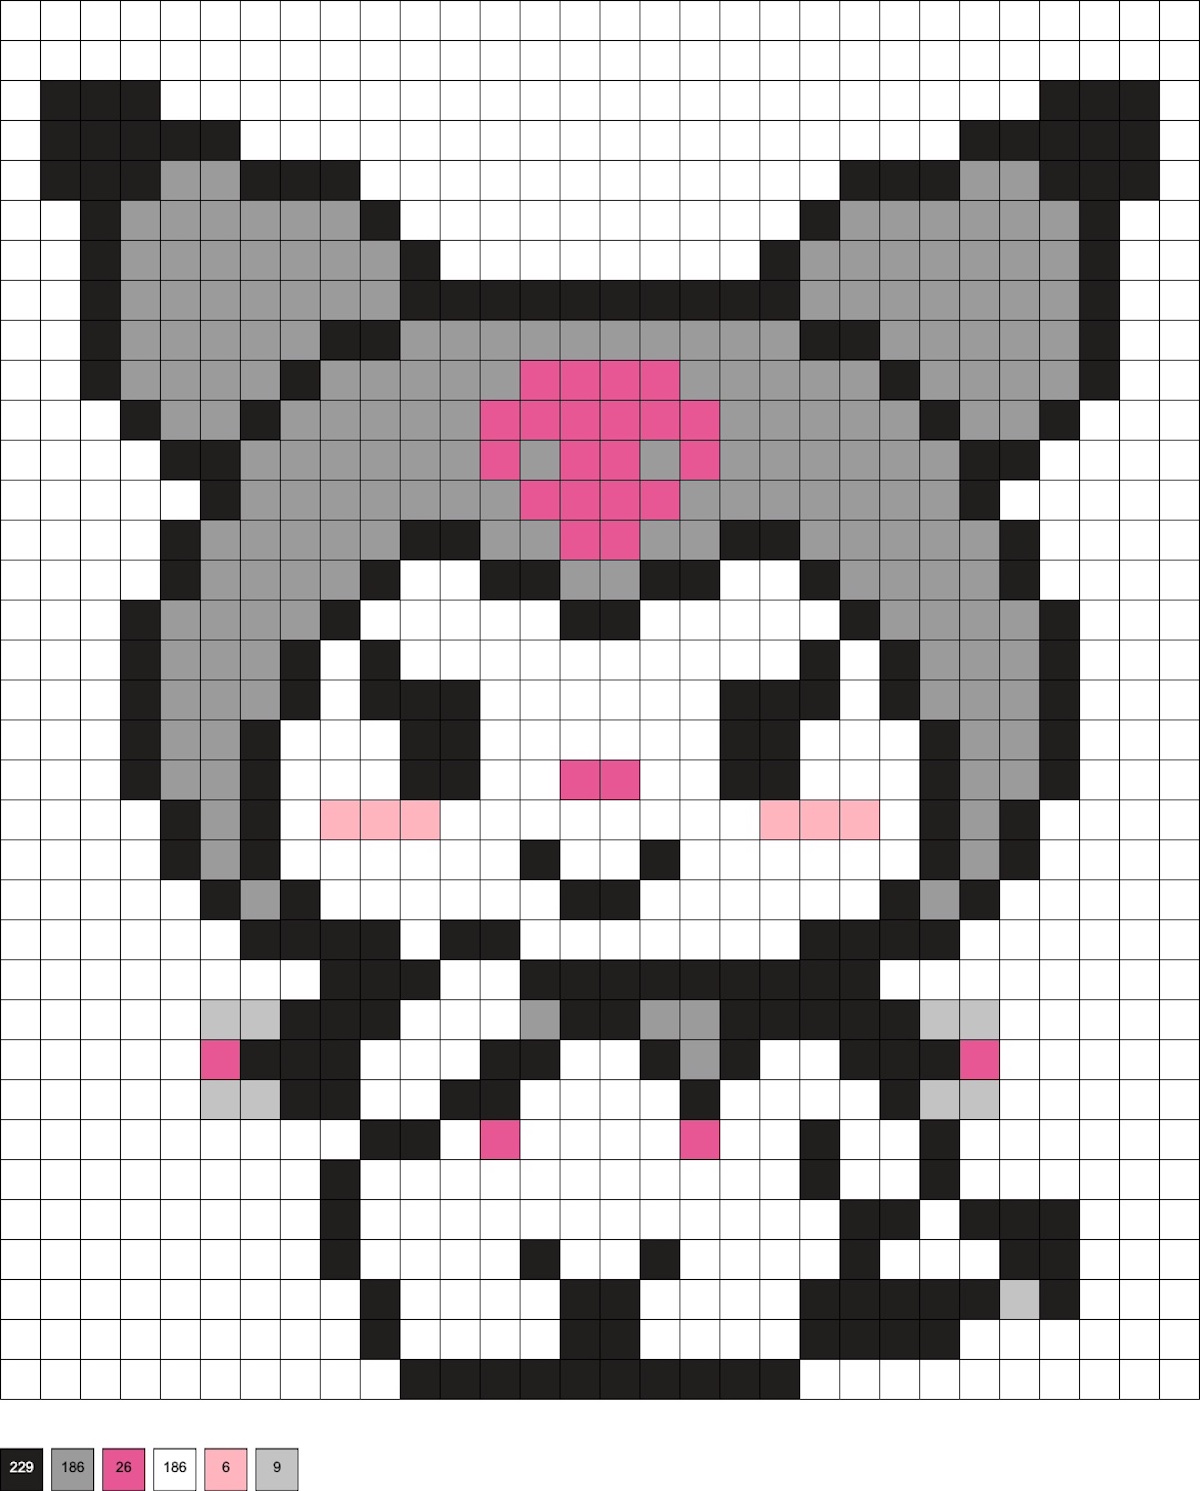
Kuromi Smiling
This pattern uses 229 black, 186 gray, 26 pink, 186 white, 6 flamingo, and 9 clear beads (optional on the collar and tail).
Did you enjoy these Kuromi perler beads? Let me know in the comments! I’d love for you to check out these other posts:
- Animal Perler Beads (60+ Free Patterns!)
- Care Bear Perler Beads (20+ Free Patterns!)
- Cat Perler Beads (Over 50 Free Patterns!)
- Emoji Perler Beads (Over 40 Patterns!)
- Fairy & Gnome Perler Beads (25+ Patterns!)
- Food Perler Beads (75+ Free Patterns!)
- Star Perler Beads (20+ Free Patterns)
- Unicorn Perler Beads (30+ Free Patterns)
The post Kuromi Perler Beads (20+ Free Patterns) appeared first on DIY Candy.


0 Comments